Not My Old Cedar Chest Any More
Simple Cedar Chest Makeover
This isn’t my old cedar chest anymore. I like to call things which I’ve had for a long time, vintage instead of old. It doesn’t make me sound as old in my head. Well, this vintage cedar chest was bought in the little town of O’Kean, Arkansas when I was a senior in high school (1975) and I’m thinking it was $40.
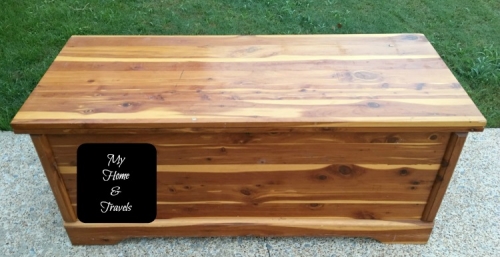
So I finally decided to update it and make it not my old cedar chest anymore.
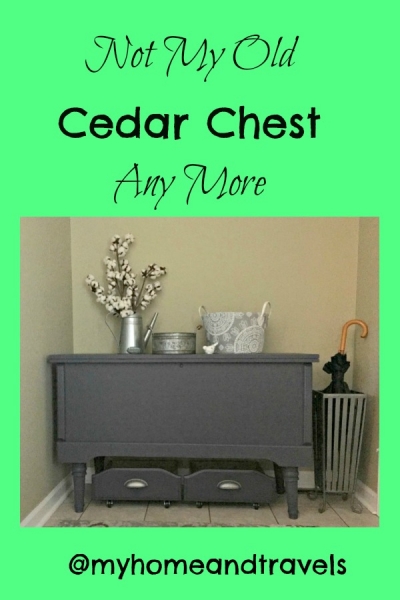
How To Redo A Cedar Chest
It’s something which I always wanted to keep, but it’s been hard sometimes to fit into a room so many times it has been stored in the garage. Recently, it fits perfectly behind the front door in the foyer but basically became a catch-all. Do you have those places? Shopping bags, those “I’ll put it here for now” things, or jackets which never made it to the closet.
After realizing we needed more storage, who doesn’t, I wanted to find a way to keep this piece here but use it better.
So a plan was made. Paint, add legs, then baskets underneath. That’s pretty much how the project was finished but I had several old drawers on hand which could be used for storage.
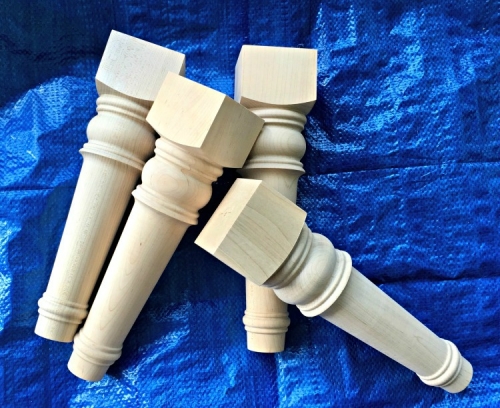
My friends at Osborne Wood sent me these awesome legs for this project. They are solid and sturdy and knew they would hold up the cedar chest.
How To Give An Old Cedar Chest New Life
The cedar chest had a few dings and nicks on it, and I noticed the finish, I’m guessing, lacquer, was crazing a bit but those imperfections didn’t bother me.
I gave it a light sanding to remove the shine from the lacquer and smooth a few edges to get it as smooth as possible without having to do a lot of extra work. This wasn’t going to be a fine piece of furniture.
I’m hoping to get some painting and work done in the living room soon so I wanted this to fit in. My first thought was white with light distressing. Then maybe a grayish-white. I finally decided to do a soft black as I’ve seen so much black in decor, I want it too.
OK – no paint on hand in that color. I was impatient and didn’t want to bother having to get ready and go buy paint, so I would make my own as I have done so much in the past. Here’s my recipe for CHALKY TYPE PAINT.
The recipe calls for 1 1/2 cups of paint so I mixed 1 1/4 cup of black and 1/4 of gray to soften the black. Keep old jars on hand for projects like this.
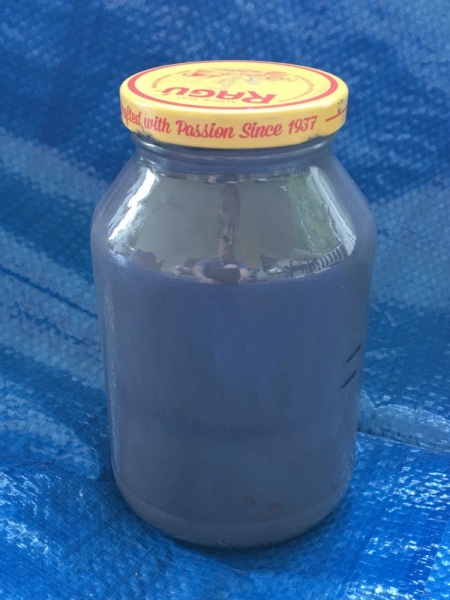
For great coverage, I did do three light coats, sanding lightly between each.
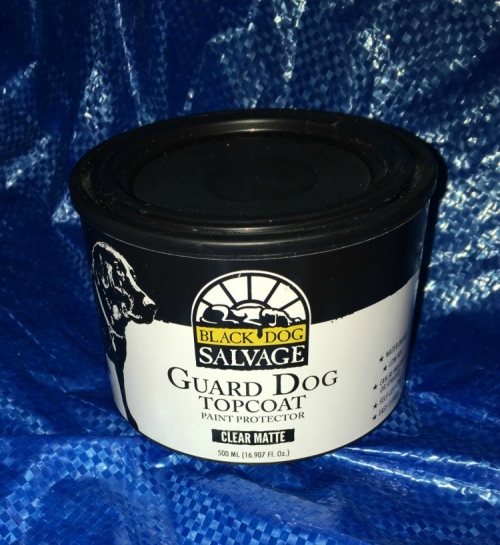
Along with the cedar chest, the legs and drawers were painted the same way. Everything was given a coat of Black Dog Salvage topcoat as a sealer after I let the paint cure 24 hours after final coat.
Sorry, no picture but the legs were attached with heavy-duty screws and wood glue. I used two for each leg, drilling a pilot hole in the floor of the cedar chest directly into the legs.
Isn’t it great when a project turns out as better than you hoped?
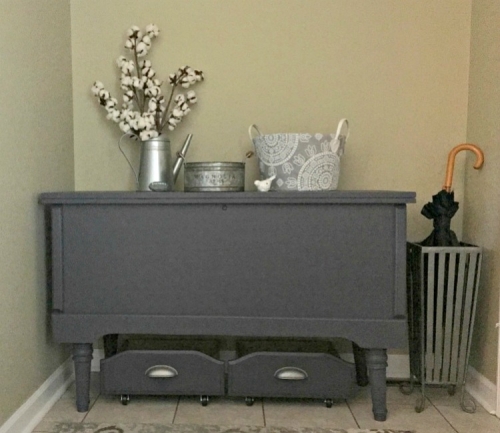
I am so loving these legs. Now I’m thinking about what else I can make and add legs to.
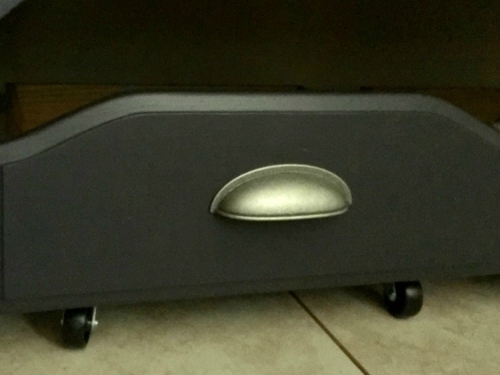
See how I turned the drawers into rolling storage HERE.
These pulls match the ones on my $7 Entertainment Center. D. Lawless Hardware is my go-to place for all hardware.
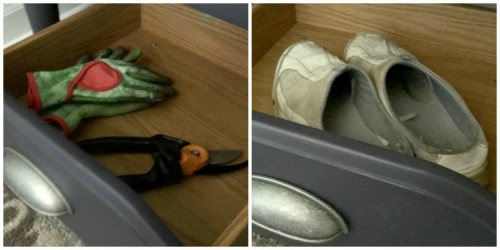
These are now being used for by outside shoes and garden gloves which I use almost on a daily basis – going in and out my front door.
This was also going to help with other storage issues – mail & newspapers.
I added a basket to throw these in along with a galvanized bucket for Derby’s leash and collar. These always seemed to end up on the floor before but now there’s a place to keep them.
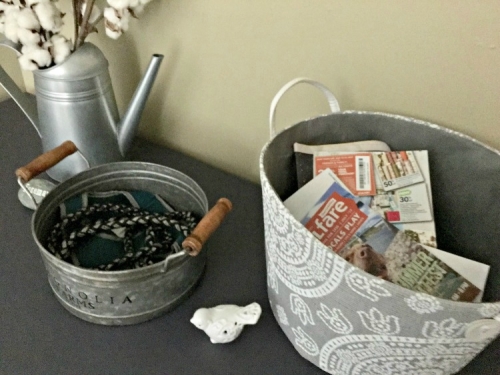
Notice the bucket – it was a purchase from Magnolia Market. Have you read about my visit to Magnolia Market?
The umbrella stand was a great yard sale find for only $3. And so handy I had a black umbrella to match.
Turning my old cedar chest into a functioning piece of furniture has not only made it something I’m proud of, but also a way to keep a little more organization to my entry.
What’re some of your favorite projects?
Another project with a major change was this faux apothecary sofa table.
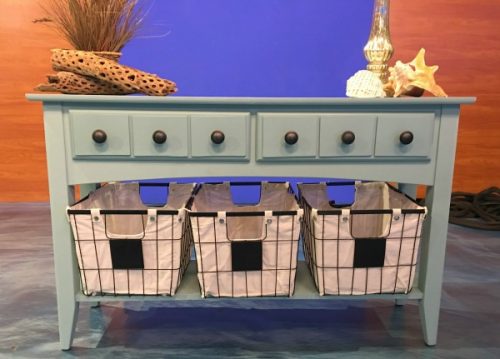
Like this simple DIY project? Check out these as well.
More Easy DIY Decor Projects
I’ve included affiliate links to Amazon for you to find some products easier. I may receive a small commission, but the price is the same for you. It just helps my blog out.
Happy Travels,
Rosemary

I love this idea! You did a fantastic job making it a functional piece. I love the color you mixed up!
Thanks. I was very happy with it. Sometimes it might be “ok” but this was a love it.
Rosemary this is such a fun idea. I especially like the little storage compartments on the bottom with the wheels.
This project turned out really good! I never would have thought to do that with a cedar chest, especially with the new legs. Great job!
Thanks. I love how the legs made it look. And now so much more functional too.
It’s amazing what a little paint and two pairs of legs will do! Wonderful makeover.
I graduated in 1974. As a promotion for girls to buy the large hope chest, we were all given small hope chests. I can’t imagine how many of those Lane furniture gave away in Columbus, Ohio! At that time, there were probably plenty of young women who purchased the large size. I wonder if young women today buy those. I would venture to say not, because there are probably more girls opting for college and work rather than marrying immediately after high school. You’ve probably seen plenty of the small hope chest samples in thrift, consignment and antique stores.
I still have my small one too. I wish I could remember who was building these back then. It’s finally getting more use after all these years.
Thats very creative of you! Nice, i like it.
Thank you. I loved the end result.
I love the way it came out, but I love the original look. I have an old chest like that I am leaving it as is 🙂
I like the original too, but it wouldn’t work in my house and I really wanted to use it.
Oh my goodness what a change! That is an absolutely fantastic upcycle, I wish I could do such things as what upcyclers do is just WOW often.
So many of these projects aren’t that hard to do. Practice is key. Let me know if you need any help.
I was just given a very old cedar chest and it is in pretty bad condition. Wasn’t sure what to do about it but you have inspired me to strip it down and give it new life.
You don’t have to strip off the old finish if you want to paint it. Let me know if you have any questions.
What an amazing restoration of this old {vintage} cedar chest, I love the colour and the legs definitely have given it new life
Thanks. Very happy with results. Always looking for projects to do.
Beautiful. Simply beautiful. There’s something so gratifying about DIY projects. I love how you changed the drawers into practical usable storage. Great job!
I’m always watching for old drawers. Who doesn’t need extra storage?
I wish I could make anything look half as good as this. I was totally not prepared for the amazing transformation! Very nice looking.
Thank you. I love to make a major change.
WHAT?!?!? You are so creative and talented! I LOVE home projects like this and I am totally inspired to make one of these for my home.
Hope you find lots of projects to do. I know my list is long.
Wow, the updated cedar chest looks really nice. I like that you added the legs to it!
It’s amazing what a difference just adding a little something can make. I love it.
Wow, what an amazing way to update an old chest! I love it. I wonder if I have anything in storage I could update like this.
Wow what an amazing project! I have an old cedar chest that I use for storage in my laundry room that just may get a new life!
I have an old cedar chest too, I store blankets in it. You did a terrific job redoing the piece but I love wood so I really like the original look.
I received several comments that I was wrong to paint – but I wouldn’t use it in my home with original finish. This chalk paint could always be easily removed if I ever wanted to.
Wow, what a beautiful transformation. I just painted my work desk but it doesn’t look half as amazing as yours. Nice job!
I bet it looks better than you think. A little paint can make such a difference.
I love that Cedar Chest! I am always picking things like this up at garage sales. I am all about DIY projects and I love that paint color!
There’s a Sherwin Williams – Iron Ore, which is a great soft black color.
This turned out beautiful! I love taking something that is tired or overlooked and turning the furniture into something new! Redoing furniture is a great way to decorate a home without spending a lot of money.
OMG, this looks so good, you gave it a new life. The paint and feet gave it a totally different look. It is very modern now and I love the color.
Oh wow this came out so beautifully!!! I love the spot you picked for it – almost like it was made for that spot! 🙂 The color is great and there’s such a beautiful modern touch to the piece.
The sofa table is very pretty.You did a great job with your projects. I wish I was that handy. I would love to make some furniture. I have my old baby bed and I’m wanting to find someone to make something out of it for me. Maybe a small bench for the front door.
I have an old crib too and trying to decide what to make. Even thinking about a dog gate.
This is a totally cute transformation! I love how it came out in the end. The feet and the paint just made it look totally different!
Oh wow. What a beautiful transformation! I looks like something I would have to ask my husband to do, that is, if I had an old cedar chest. Maybe I can find one in a garage sale. Thanks for the idea!
I love how it turned out. I see old ones for sale all the time. Good luck.
I am refinishing an old cedar chest and considering putting legs on it to use it like this. What length are the legs you added?
I think they were about 10 – 12″. They were tall enough to allow some storage underneath,