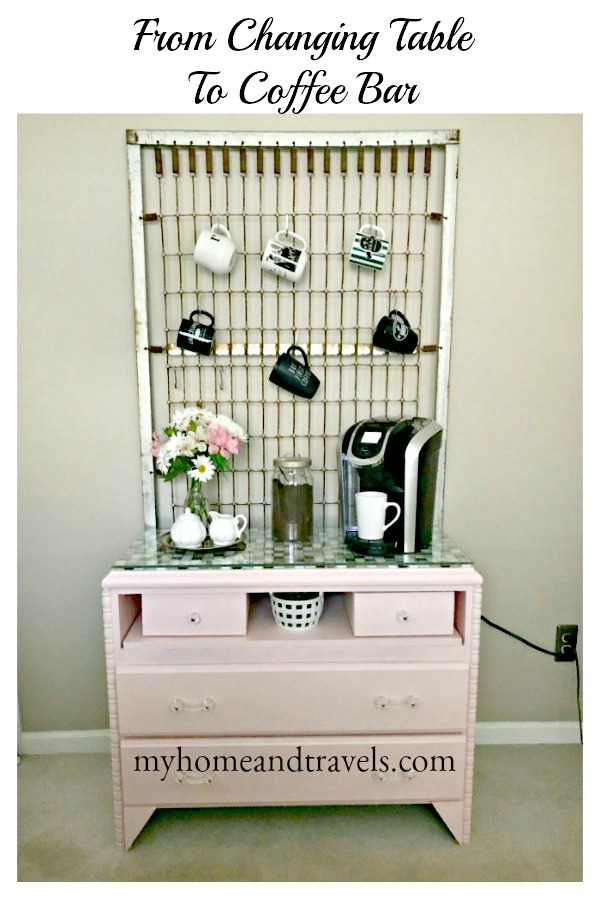
From Changing Table to Coffee Bar
A design feature which has been very popular over the past couple of years is a coffee bar. This can range from an area on your counter, to a special set up in a non-kitchen room, to an actual “bar” area. I am very limited on kitchen counter space so I decided to make a piece turn from changing table to coffee bar.
The original piece was a changing table/dresser from my son’s nursery, and he is now thirty-one years old. One of those those things I just never wanted to get rid of even though it wasn’t a great piece of furniture.
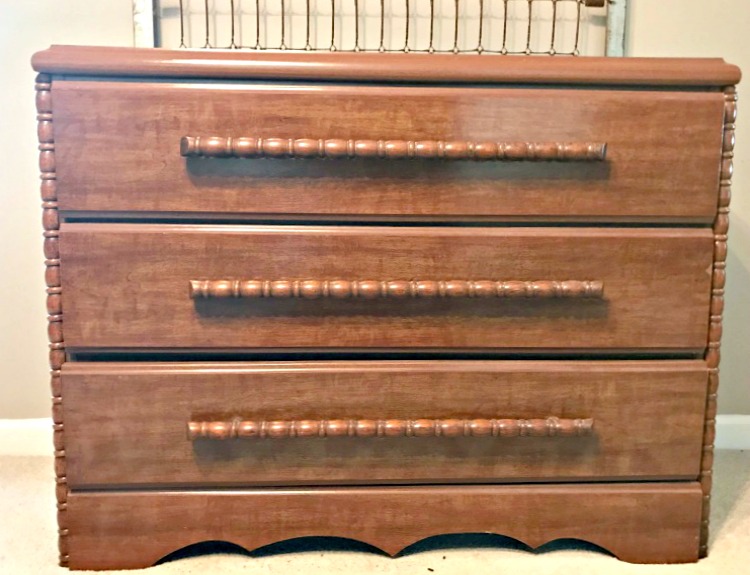
The brand new crib, changing table/dresser, and chest was bought for about $150 from an individual selling furniture out of his garage. This was long before buying used furniture was a thing. At that time, a lot of furniture was either passed down to other family members or thrown away. It’s made of particle board so there wasn’t a lot of choices in refinishing, but I knew I could paint it.
This new coffee bar is in the dining room but it’s just around the corner from the kitchen so it’s not out of the way for my coffee. My coffee can’t be too far away, or inconvenient.
I moved this piece into the dining room around Thanksgiving to see if it was going to work in the space, or if not, what would I need. Luckily it worked.
I needed something to go above it and remembered my friend Karianne from Thistlewood Farms had an old gate above a chest in her hall. So I was on the hunt for one because I wanted to hang mugs from it.
Then I had a light bulb moment of something I had bought a few years ago at an estate sale and it never worked where I wanted it. This old twin bedsprings fit just right behind the dresser. I’m glad the hoarder was in me and I didn’t get rid of it.
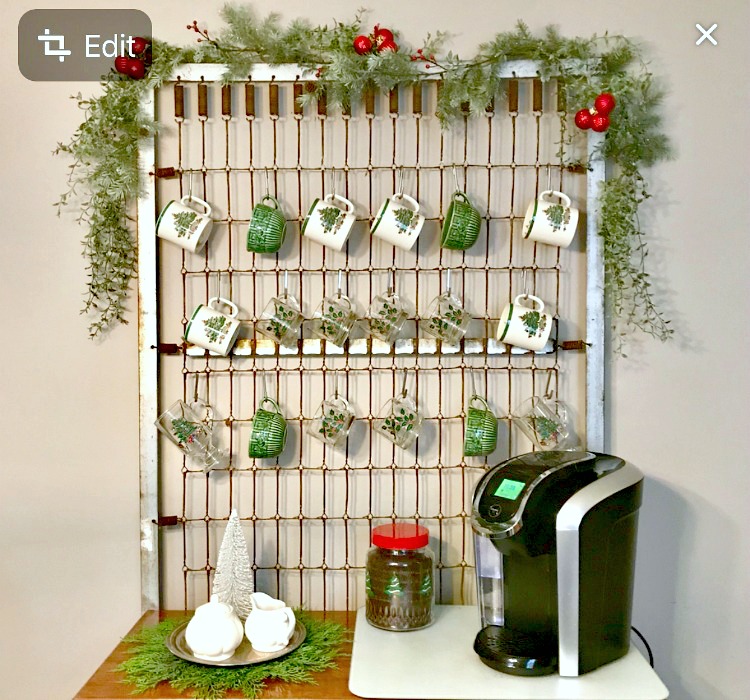
I had it decorated a little for Christmas.
There was plans for the dining room to get a makeover but no real design had been set so I was waiting on painting the piece. I don’t have a certain style or theme in my home, it’s more of just what I like and think will work for us.
A design and colors were chosen, although I still don’t have an official name – for now I’m calling it my Shabby Chic Glamourous French Country Farm House. That’s a mouth full and maybe not a true style, but I’ve never been one to always follow the trends.
I knew one thing from the beginning, the ceiling would be black. I was at a Show House last year with a soft black ceiling and immediately knew I wanted one. I have painted several ceilings before in a shade of the walls, but never black. I’m in the process of finding a chandelier now.
Now with using black and white, I wanted to incorporate softer colors into the mix of things, and chose a soft pink and green. So pink it was for the coffee bar.
Before painting anything, whether it’s a piece of furniture or a picture frame, a little prep is always needed. I don’t go by the saying of “no prep needed”, yes some is always needed.
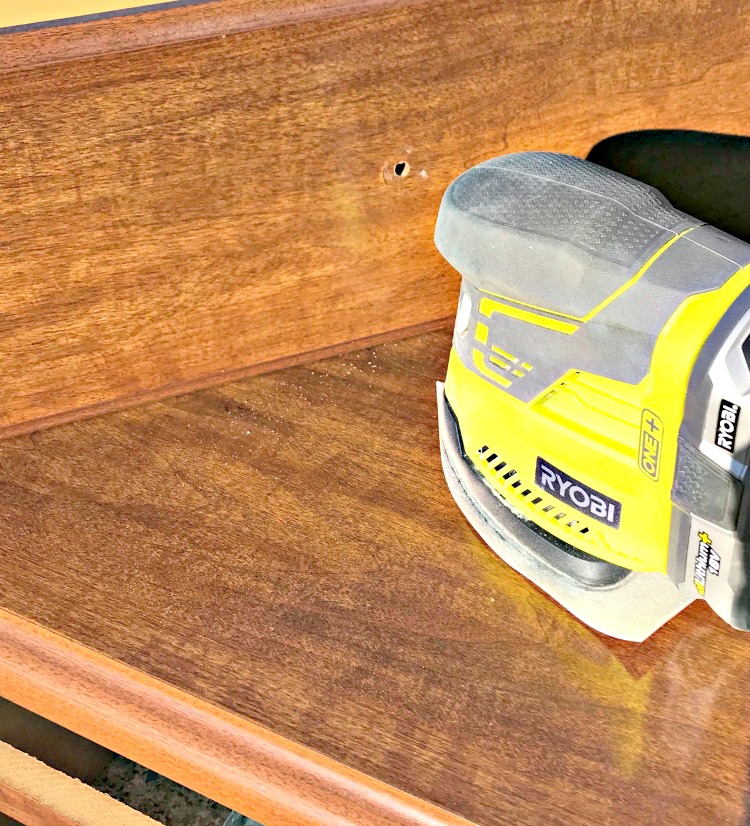
I removed the drawers, handles, bottom scallop piece, and drawer glides from the top drawer only. A good cleaning and sanding was done. The sanding was especially needed since it had a very shiny and slick finish so the paint would have something to adhere too. I can’t recommend having a power sander, even a smaller one like this Ryobi Corner Sander makes any project go easier. And quicker.
Sometimes you have plans for a piece but then things can change and or maybe not work out.
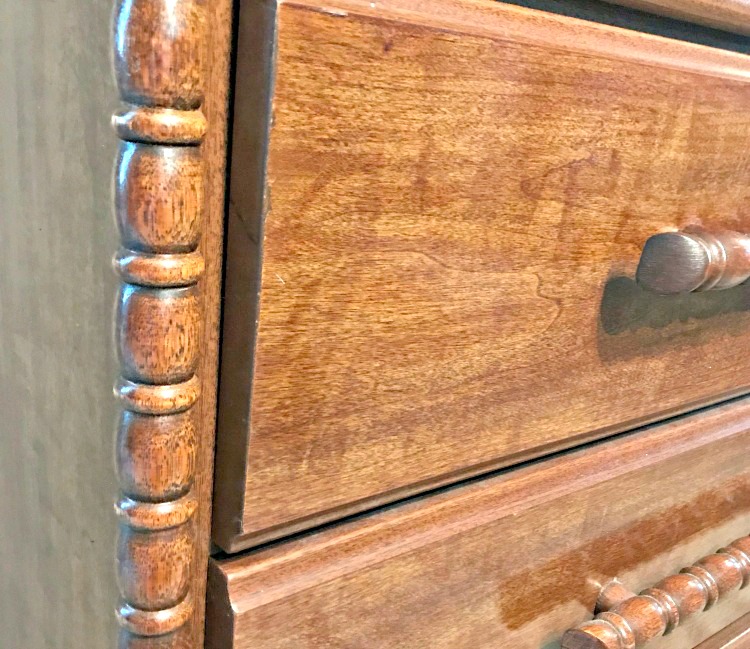
I had planned on removing the corner trim for a more streamline look but when trying to do so, the stability of the piece was being compromised so it had to stay.
I thought if I replaced the scallop bottom with a straight edge, it wouldn’t look like bedroom furniture so much. But when I placed a straight piece on it, it looked too much like another drawer on bottom and flat on the floor. So that was a no.
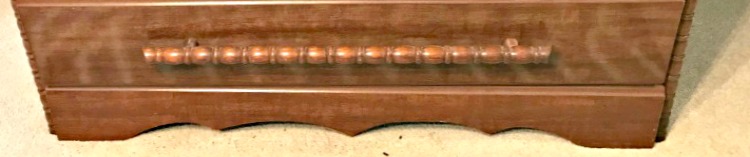
I liked the open look of the bottom but the corner braces showed. I cut a small triangle piece of wood and it worked great.
The top drawer was being removed and replaced with an open shelf. I picked up a piece of shelving at Home Depot to fit the measurements.
Now I was finally ready to paint.
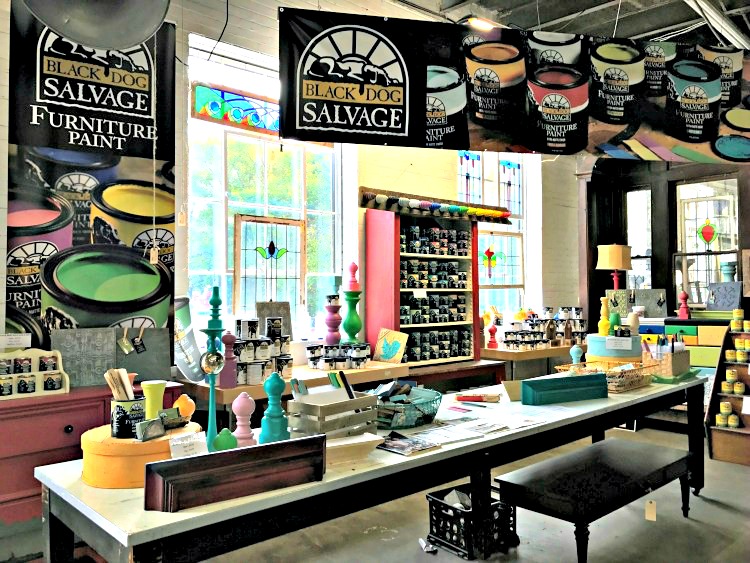
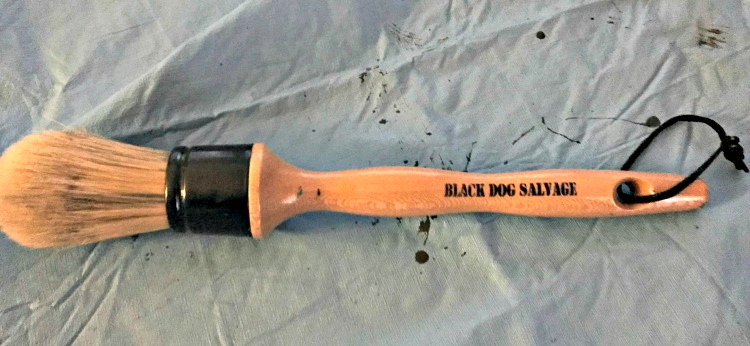
My favorite paint for most projects is Black Dog Salvage Furniture Paint. They have 15 colors but no pink but I could easily mix my own custom color. They do have recipes for many colors but the watermelon pink recipe seemed a bit bright.
Whether you are you using this paint, or even a spray paint – always read and follow the directions on the can. For Black Dog Salvage Furniture Paint, it’s very important to stir the paint, not shake it. The pigments just aren’t going to get thoroughly mixed by shaking.
Another hint for this paint – the day before, or even a few hours before using, turn the can upside down to let those pigments mix a little.
For making the Watermelon color it was 2 parts Clean Canvas (white) to 1 part I Need a Bandage (red) so I tried half part red. You can find the recipes here to download or print a copy.
It turned out to be a very pretty pink and I gave everything a light coat. Black Dog Salvage has a round brush which holds a lot of paint and gives good coverage since this paint is considered to be self leveling, less brush marks, to hardly any, will show. I love that smooth surface you get.
By the next day, I knew it was too bright. I actually had a feeling while painting, but thought maybe it would be ok. WRONG!
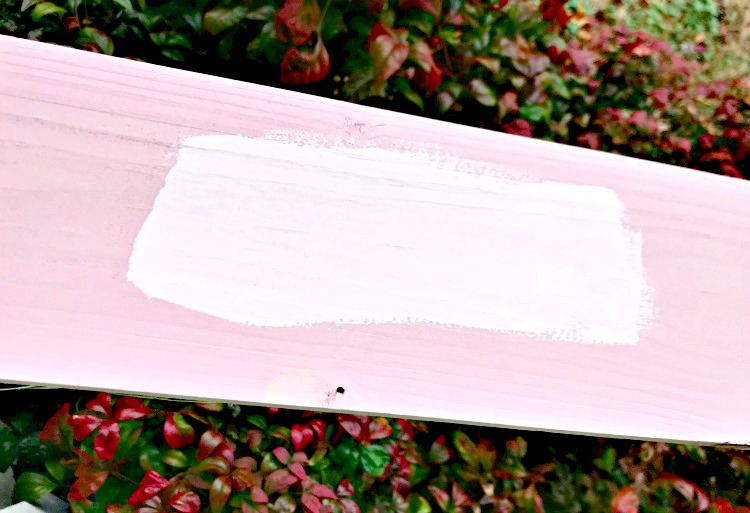
The red has very strong pigments so I knew it wasn’t going to take much to get my pale pink.
No measurement here, I just drizzled a small amount of red into the white and once I could see pink, I stopped, especially since most paints are going to dry a bit darker. I tried it and was very pleased with the color.
I would guess there wasn’t even a teaspoon of red to a cup of white. That’s one of the great things about this paint is the ability to make your own colors as you need them. But I do suggest to always mix enough for your project you are working on and store in an air-tight container.
The new pink went on and I loved it. After the paint cured for 24 hours, a topcoat of Guard Dog Topcoat in matte was added. It also comes in a satin finish.
After deciding on pink, I knew it had to have some pretty jewelry these glass pulls and knobs from Liberty Hardware did the trick. A lot of Liberty Hardware can also be found at Home Depot. I just had to drill one extra hole in the drawer fronts.
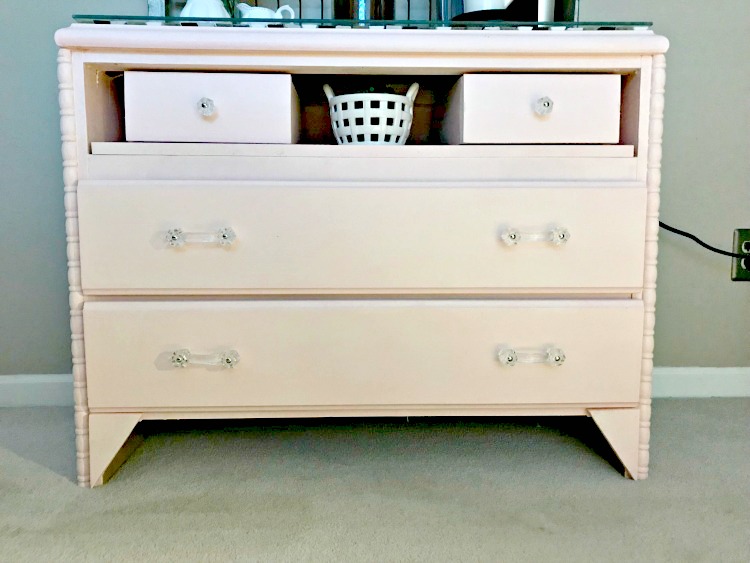
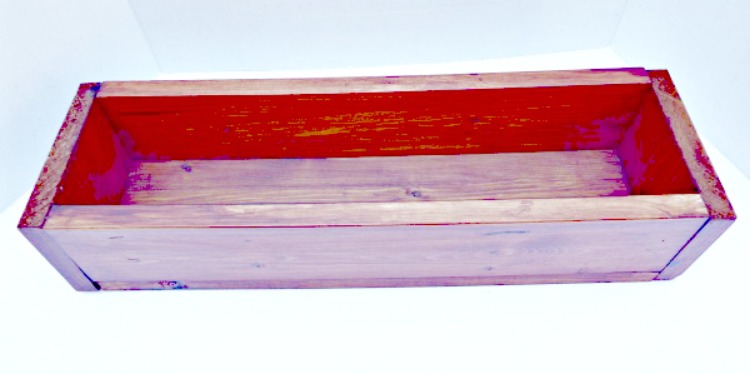
For the top shelf, it needed some extra storage but I couldn’t find baskets which either fit or I liked so I decided to make a box drawer. Mine were 10.5″ x 14″ but you would make them to fit your piece.
They were made like I did these decorative boxes. I made sure the front piece was solid so seams wouldn’t show. I have upgraded a couple of my tools since then. The Ryobi Brad/Nail gun makes the work easier too.
A glass knob to match the pulls were added along with felt pads on the bottom so they would glide a little easier.
The top went through many thoughts and this is the result for now. I had several sheets of this glass tile from a conference I attended and loved the colors of the white, silver, clear and concrete look.
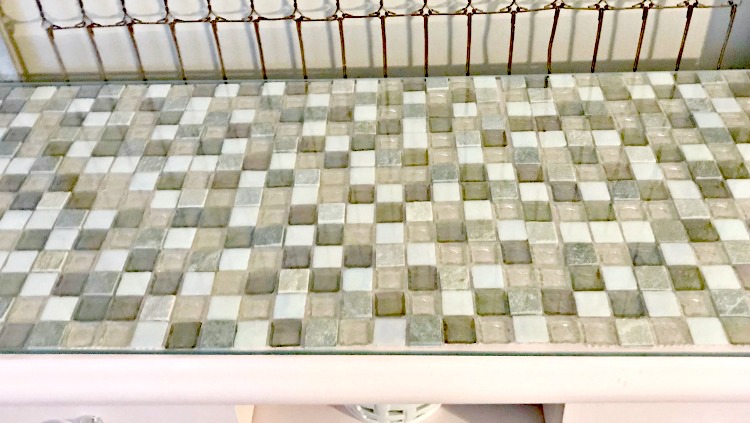
Since I was using this as a coffee bar and water would be around it a lot, I decided to add a piece of glass to the top, plus the tiles were a bit uneven. I got this cut at a local glass store, and had the edges polished so no sharp edges are on it.
There will be more styling and decorating after the makeover is done. Also, I’m starting a collection of mugs, mostly black and white. Hoping to find more also during my travels.
Now only if Keurig and other appliance companies would have longer cords.
This is one of those pieces I have done that I’m really happy with the outcome. Some might be ok and I can live with it, but then some you are proud of.
I hope you enjoy this project and here’s a few more I have done.
What kind of projects are you working on? Do you have a coffee bar? I’m thinking I might just need to make another one for my bedroom. Why walk to the other end of the house first thing of the morning?

I’ve included affiliate links to Amazon for you to find some products easier. I may receive a small commission, but the price is the same for you. It just helps my blog out.
Happy Travels,
Rosemary


Wow, this is such a brilliant idea. I rarely have read and seen something like this. I find it very interesting and smartly done. Will try to make my table to a coffee var, If I get the chance. Thank you so much for sharing this with us.
I love turning old things into something new. Good luck on your projects.
You did a great job in dressing-up your old table. And I like the color of your choice! Its very youthful and brings good vibes.
Turned out really cute. I don’t need a coffee bar but a tea station would be perfect for my home. Great idea.
These came out great. I have a couple of drab pieces of furniture that could use some new life brought into it.
What a great idea and I’m in love with the color. The color scheme in my great room/open to the kitchen is navy/blush with touches of mustard so the color is awesome too! I also love the tip about turning the can of paint over the day before painting. You are so clever!
We don’t have a coffee bar, the coffee maker on the counter works perfectly or us. The wood of the original piece was lovely, I am such a big fan of wood.
This is such a fantastic idea! I love how this turned out. I think we just sold our changing table but I wish we would have kept it now.
What a fanatastic idea! I love the colour too. I would love to do something like this if I could find the right piece. This turned out just gorgeous!
I never imagined doing this but it’s such a great way to refurbish an old cabinet or dresser. I’ve always liked the idea of having a coffee bar! Thanks for this!
Wow! This is FANTASTIC! It was a great way to reclaim that changing table and I love the twin bedspring hanging behind it for cups and mugs! I’m also a huge fan of what I call Princess Pink, and you nailed the color beautifully! Love, love, love it! Did I mention I love it?! 🙂
Thanks. I loved how the bed springs are working for my cups, but I’m afraid with a few changes I’m making, it may look too rustic.
Wow! What an awesome redo. I would have never thought of refurbishing a changing table to a coffee bar. It turned out great! Love DIY
I work part-time in a vintage shop. I always love to see how folks upcycle stuff. It gives me inspiration and ideas to share with my clients. Thanks, great projects.
I am far from the most creative person, but just enough to figure out how to make changes.
What a beautiful make over of an old changing table! I should try repurposing old furniture too. A coffee bar would work well in our house. We love our coffee and having everything we need in one place to make a cup would be a great idea.
That turned out so great! I always try and re purpose furniture, and this is a great idea.
This is a lovely transformation. Love the color choice. You did such an amazing job with this project!
This is a really nice project idea! You have some nice craftsmanship!
I need to find a little project like this. I have always loved working on stuff like this.
What a clever transformation. I love my coffee station. I use it every morning and rely on the convenience for making a great drink.
Incredible inspiration. I always get excited when I see old things repurposed as new. Some great ideas here that are unique and original. Love the pink choice for the top piece.
I’m loving the pink. Very out of the box for me.
That coffee bar is very lovely. Your tables are all beautiful! I would love to convert my grandmother’s antique pieces into something modern. Your creativity is amazing! 🙂
When working with antiques, if it’s valuable, money wise, I hesitate to paint. But, if you aren’t using it and would when painted, go for it. It’s yours to enjoy.
That turned out very well. I have a dresser I would love to paint a more interesting color someday. I need more color in my home.
It’s so easy to paint things, and with this paint, making your own color is a snap.
This is such a precious changing table and now it is converted to a coffee bar!I am sure you son would admire this!The final finish is really attractive with pink paints.
He’s loving it, pink maybe not so much. But he knows I like it.
Wow this is so impressive! I’m not nearly as handy so I don’t think I can pull this off but kudos to you for reusing an old item and making it new again!!
Start off with a small project, maybe a $5 yard sale find, and practice.
I love making crafts. Me and my daughter are alwaya making things for my office.
It’s nice to include your daughter with your projects making memories.
What a great idea! Love DIY’s and love how simple you’ve made it seem. The colours are a total win for me!
Thanks. With all guys around me, I decided I needed something pink.
Such a great transformation! Love the idea of upcycling it!
Thanks. I was very happy with the outcome.
Wow, that is such a brilliant idea. I wish I could be as creative as you!
Oh thanks. Sometimes just look at the need you have then look for something to fill the space. And think outside the box for a color.
Wow, this is really amazing. I rarely try to renovate my old furniture, but you make it look kind of easy that I am willing to give it a try. Love your choice of color too, thumbs up to you!
Hi Rosemary, I’m visiting from the MAKE IT NEW FB group! This is just darling! Love the colors and the way you used the crib springs! Blessings, Cecilia @ My Thrift Store Addiction
I love this! I’m in the process of redecorating my office and trying to figure out what to do with some old pieces I have. I’m definitely going to try to reuse them now. The transition is amazing.
Thanks. Of course this piece meant something to me although it’s not worth a lot.
That is such a pretty transformation and I love the choice of color too. The mattress spring was also a great idea and adds character to any room. I really like how it all came together with the tiles, glass top and pretty knobs too.
I loved how it finally worked out. A favorite of mine.
This table turned out so cute because it has really nice features. By the way I love the color!!
One of my favorite projects.
Oh, what a great project! Lovely colour. I love turning old things into new things as well. Well done. this is making want to do some diy stuff around the house too.
I love buying new stuff, but so rewarding to use what you have. Then love it even more.