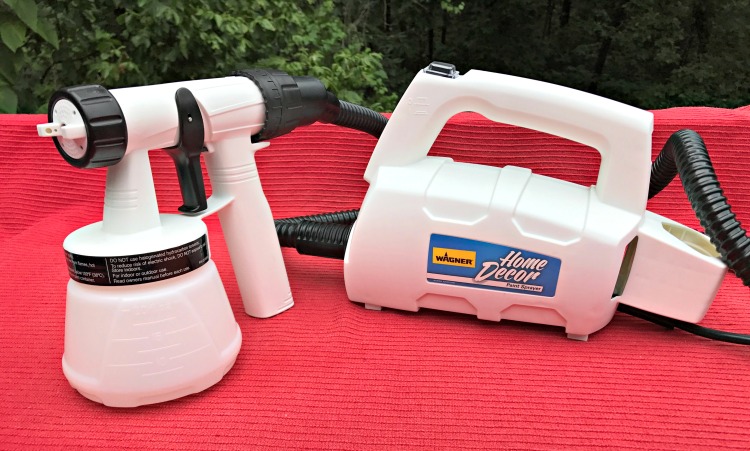
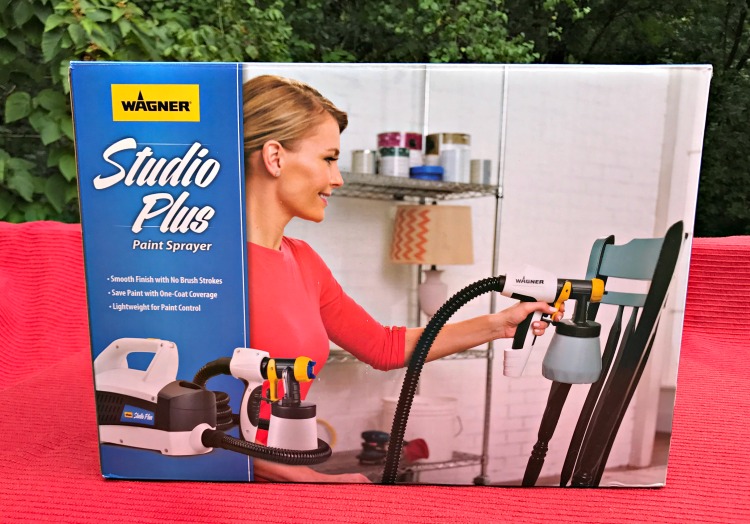
Using my Wagner Home Decor Paint Sprayer
Do you have a thing for tools and gadgets? I sure do. It’s like Christmas morning when happy mail arrives with these, especially new tools you’ve never tried before such as this Wagner Paint Sprayer. Using my Wagner Home Decor Paint Sprayer has been a game changer for any of my DIY & painting.
Thanks to Wagner for supplying these products for my review. All opinions are my own. I will be doing lots of projects with this.
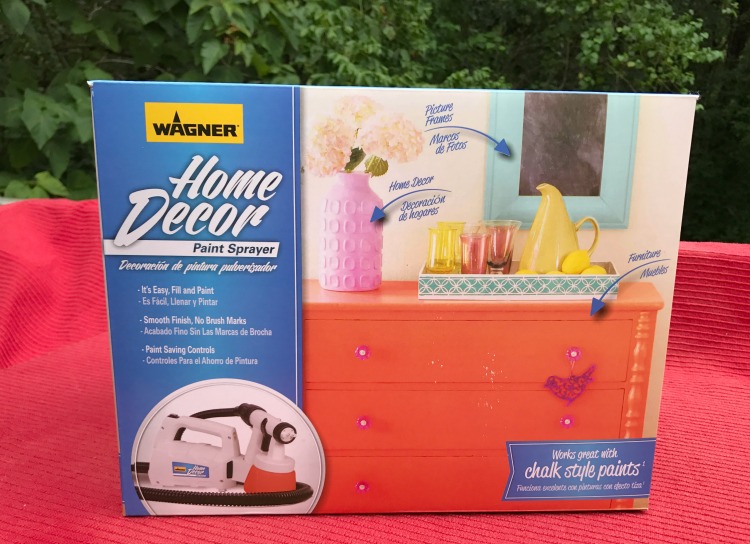
This Wagner Home Decor Paint Sprayer is just that. It’s designed for all of DIYers having a compact and easy paint sprayer for home projects.
Never used a paint sprayer? Neither had I before I used this one. You may think about those large paint sprayers attached to an air compressor with lots of power. The Wagner Home Decor Paint Sprayer has plenty of power, it’s lightweight, can use most types of paints or stains, and really easy to use. And better yet, easy to clean up.
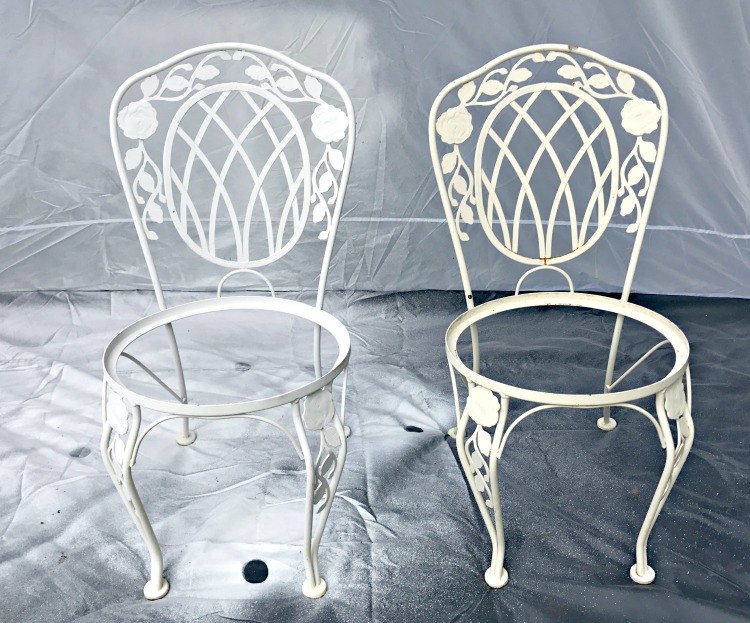
This is a vintage set purchased at an estate sale and was in pretty good shape, except for the chair bottoms. I knew a good cleaning and painting it white, would make a huge difference. There will be a post later on how to make the chair bottoms.

A light sanding was done for a few rough spots, but the paint was mostly in great shape. A little rusting was showing so I used an outdoor paint which would keep the rust from coming through, and prevent any further rusting.
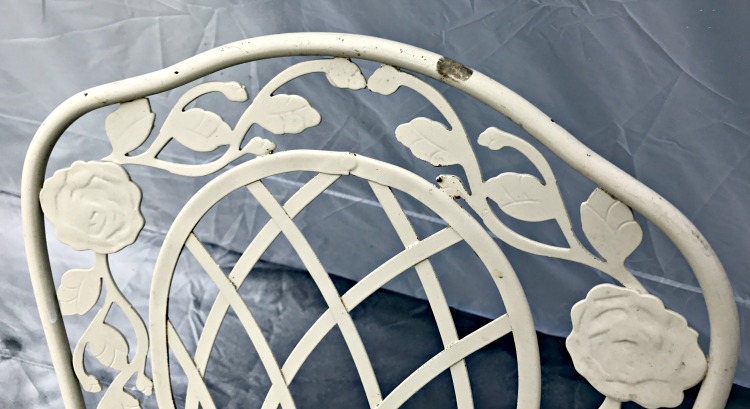
After cleaning with TSP, it was ready to paint.
My husband and I sat up the Wagner Studio Spray Tent to use.
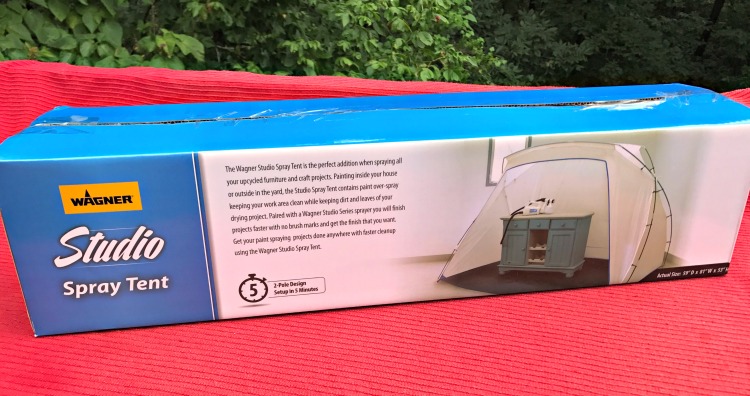
The five minute set up advertised, did take a bit longer (just a few more) since was the first time, but after that, five minutes is all you need. You can find it HERE.
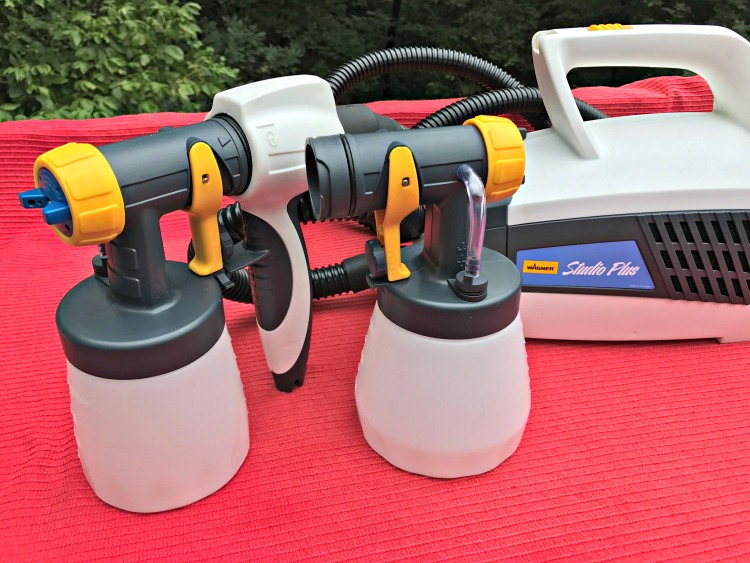
Assembly of the sprayer – not too many parts so it was really easy to do. Always read your manual first.
Now to paint.
The paint cup was filled to 450 ml (there’s a line – I’m not up on ml measurements) using an old ladle. Remember how I said I like gadgets, I have many from my kitchen and they do come in handy.
As per instructions for the paint sprayer, most paints are going to require a slight thinning. For my paint, it wasn’t as thick as some I’ve used so as it was my first time using my Wagner Home Decor Paint Sprayer, I tried it without any thinning, but I wasn’t producing a smooth finish.
It comes with a practice sheet to try the paint on. Or I found an old piece of cardboard worked well too.
I thinned it with just about a fourth of a cup of water to my 450 ml paint and it worked great. Most instructions say 10% – 20% thinning, so start off with less to try it.
Just that little bit of water gave me a smooth finish like I wanted.
To paint, pulling the trigger, I started off the edge of my chair then go at a slow, steady, I went across the back, off the edge, then back again about 3″ – 6″ from the surface.
I continued this until I came to the seat of a chair as it was a good stopping place.
Don’t hold the sprayer too close, go too slow, or stop in the middle as you can cause your paint to run.
Two coats of paint and they are ready for a new bottom – coming soon.
This other metal chair were painted in pretty much the same way. One exception was there was a lot of peeling paint on them so I used my Ryobi Pressure Washer to remove most of it, but then did take a wire brush to finish it off. This is a great small power washer, very user friendly.

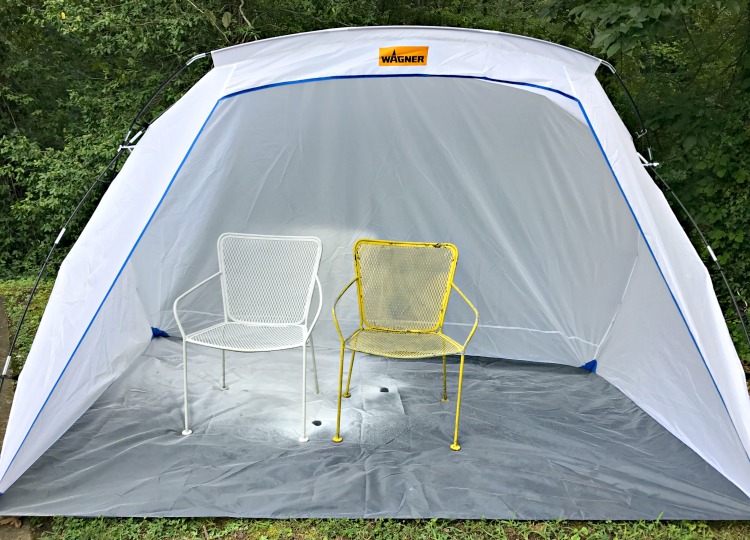
Using my Wagner Home Decor Paint Sprayer on this mesh set was totally the best way to paint it. It took several cans to paint it the first time, and it was time consuming.
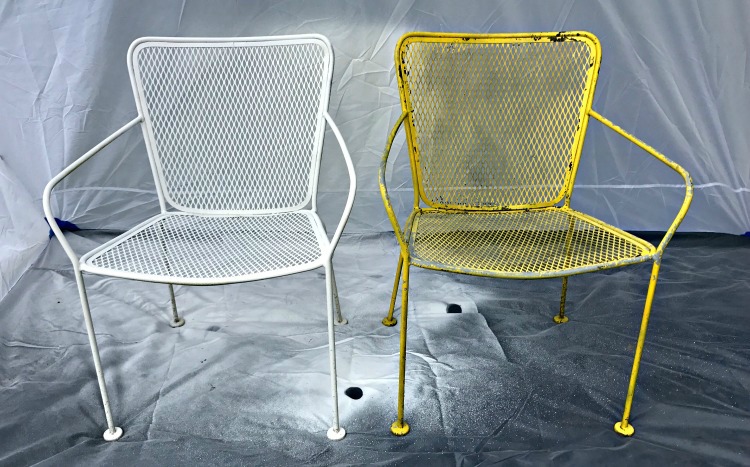
A brush wouldn’t have worked well as it’s hard to paint something like this without having the paint puddle in the mesh.
Final thoughts – I highly recommend this Wagner Home Decor Paint Sprayer for any of your home decor. As with anything new, practice first and try out your paint before starting your project.
Have some old rags on hand to wipe off the nozzle if it seems to have any paint collecting around it.
Watch for drips.
Use a paint brush to brush away and drips if you do get them. Makes it easier to do it then as having to sand and repaint later.
The Wagner Studio Tent is also a great addition to your tools. I have painted my grass many times with at least some overspray. During the winter outside spray painting can be hit or miss, set the tent up in your garage. Of course, still watch for any overspray and cover or move items. Like your car.
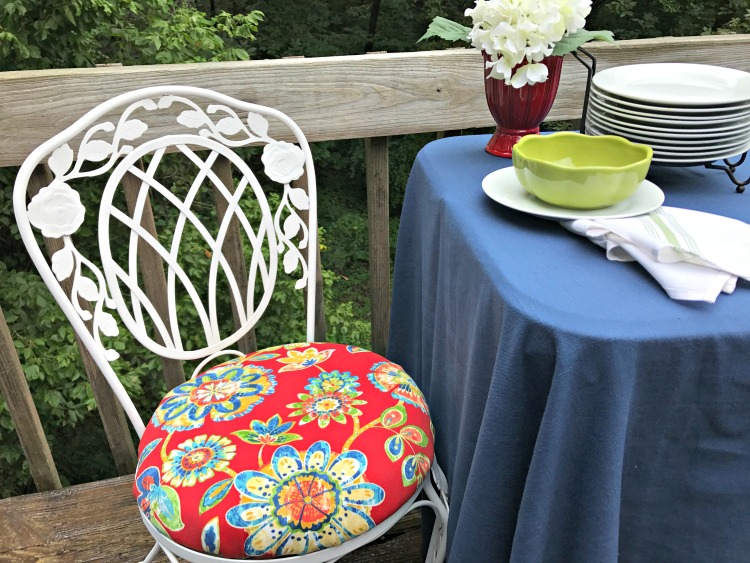
I am so happy with the outcome of the vintage patio chair. And can’t wait to get the whole set complete.
Coming soon:
How to make and recover a chair bottom
I will be using the Wagner Studio Home Paint Sprayer (if the rain would stay away, my deck railings will be painted).
Now off to complete these two patio sets and to find anything else which could use an easy paint job. I have a set of bar stools which I can see will be so much easier with a paint sprayer than a brush.
I’ve included affiliate links to Amazon for you to find some products easier. I may receive a small commission, but the price is the same for you. It just helps my blog out.
Happy Travels,
Rosemary

Thank you for this thorough review. I really liked that you included the tips to thin the paint just a bit (10%). I think that skipping that important step causes the sprayer to clog. I’ll have to keep that in mind.
I’ve always kinda wanted a paint sprayer, but never wanted to deal with an air compressor, so this seems like a great solution! The spray tent is such a good idea too. I love how your chairs turned out!
These are so handy since they are easy to use, and better, easy to clean up. Sprayers have come a long way.
Those turned out great! But I’m more impressed with that spray tent. I didn’t realize that type of thing was available!
I’m not the most crafty person in the world, but your review put things into perspective for me and helped me to realize DIY projects can be fun and therapeutic in a way. Thank you.
Let me know if you need ideas, or just follow me along. Not all projects have to be big. A little paint can change the world.
Those are so handy to have when you’re decorating the home and doing some DIY! I love the tent to keep things clean and how easy it is to set up.
Sophie | MapleTreeBlog
I love the tent. I plan on setting it up in the garage this winter so I don’t have to depend on the weather.
This was interesting, the final painted product turned out to be awesome. Loved the photos and yes it was a new info to me wrt these Sprayers.
Paint sprayers are so much better now since they are designed for the home user. Hope you check it out.
Wow this looks so fun loving activity which we can do of its own without any labour need. These old chairs turned totally changed and looks new ones. And the spary tent is the best out of all.
It’s amazing how a new product can make projects easier and quicker. Thanks for following.
Wow the difference here it quite amazing! I love how white the furniture got!
I have always wanted one of these! They seem so practical for small jobs around the house and it appears that it really is. Thanks for the tutorial and review – might go pick one up this weekend and freshen up some furniture.
Sarah
http://www.hitcontinue.eu
I’m more impressed with that spray tent, I love how white the furniture got. Thanks for sharing!
The tent really does help with Mother Nature. I will set it up in my garage this winter.
I found this post at the right time! I’m getting more and more into DIY’s so I need to know about tools like this to make my life easier!
This is made for people like you. It’s very user friendly. And Easy.
At first I thought I cannot go through with the painting but while reading your post. I gives me a lot of idea. I love how you explained everything. Practice first for me.
Great fun & loving activity which I can do on my own without any labour need. New product can make projects easier and quicker. Thanks for this useful tutorial and review !
This paint sprayer is great. Cuts down on time so much.
Wow! What amazing results! I don’t think you’ll get the same finish with a paintbrush alone 🙂 Great job!
I sometimes avoid projects because they would be too time consuming. But with this sprayer, it’s great.
I have never tried paint sprayer before but this product looks amazing! I think that it would be a great family fun activity to paint all the old furniture!
This is very user friendly. And it cuts down on time. Hope you try it.
Looks amazing, like magic. I love my wagner sprayer too.
It seems this Wagner Paint sprayer is really helpful and easy to use with DIY projects.All these final products are awesome with the final touch of paints.
It is really easy to use, and such a time saver.