How To Make A Faux Moss Planter With Paint
Who hasn’t drooled over those perfectly aged planters? All of those bits of moss growing over the years just adds to the appeal of planters. Don’t you wish there was a way you could achieve that look without waiting a few seasons? Well now there is a way and I’m going to show you how to make a faux moss planter with paint by Plaid.

Have you seen “Painted Finishes” by Plaid. I’m not sure if I like the faux moss or faux concrete better.
After seeing a terra cotta pot recently in a specialty garden shop priced at $19 – I knew I could do it a lot cheaper. And I did.
Advantages of the moss paint is it works for outside also so you can make your own weathered looking pots and add as much dimension as you like.
And this works on most surfaces. I did find I liked it better, and they do recommend it on a textured surface, but on a plain pot also. It’s just not quite as weathered looking to me.
If you don’t have a stash of old planters and pots, terra cot pots are pretty cheap at garden centers or craft stores. Or check out Dollar Tree for plastic pots as this paint works on this surface too.
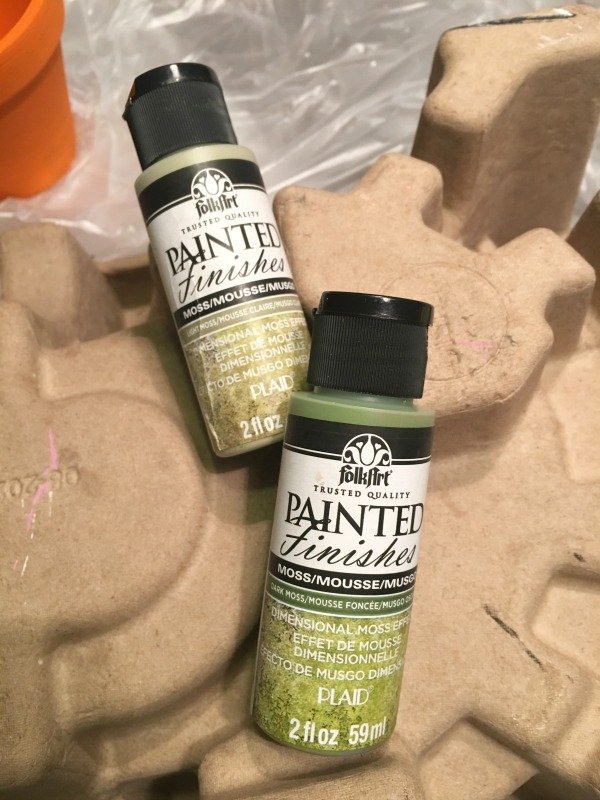
What I used:
Plaid Painted Finishes Light Moss
Plaid Painted Finishes Dark Moss
Paint Shortie Brush
Styrofoam plate
Terra cotta pots
Old concrete planter
Styrofoam plates are my buddies when using craft paints. I recommend the Plaid brushes for this project as the stiff bristles makes applying the textured paint easier.

Since there is texture in this paint and you are stippling the paint, it can splatter a bit, so make sure your surfaces are covered and wear an apron to protect your clothing.
As always, follow directions on the paint bottle, especially shaking well.
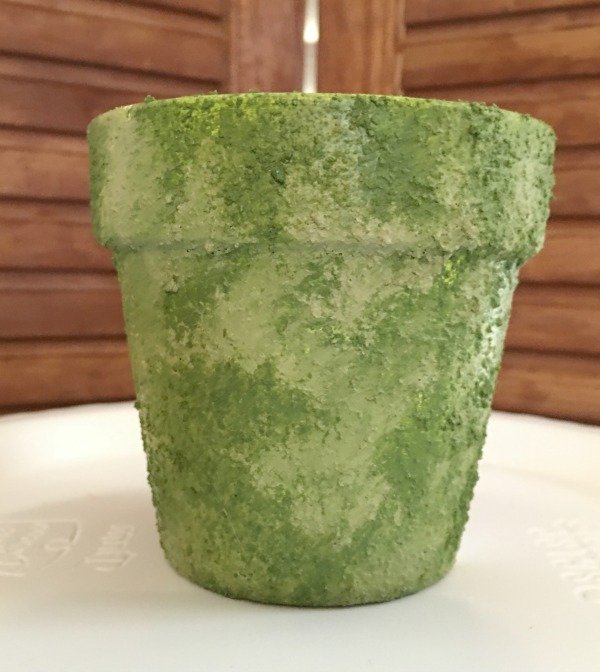
There are two colors to use for this so squirt each color onto a styrofoam plate. Since I like to make it appear more textured, I squirt each color side by side and let it fun together just a little.
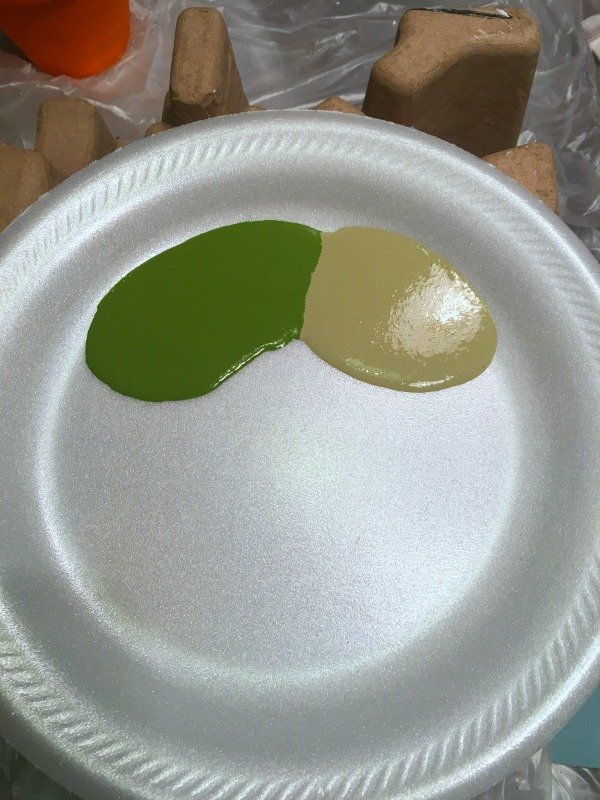
This does dry fairly quick, so don’t put too much paint on the plate at a time.
Begin with the darker color, having your brush slightly damp – paint this on in the areas you want covered, with a stippling or pouncing action, not your normal paint strokes.
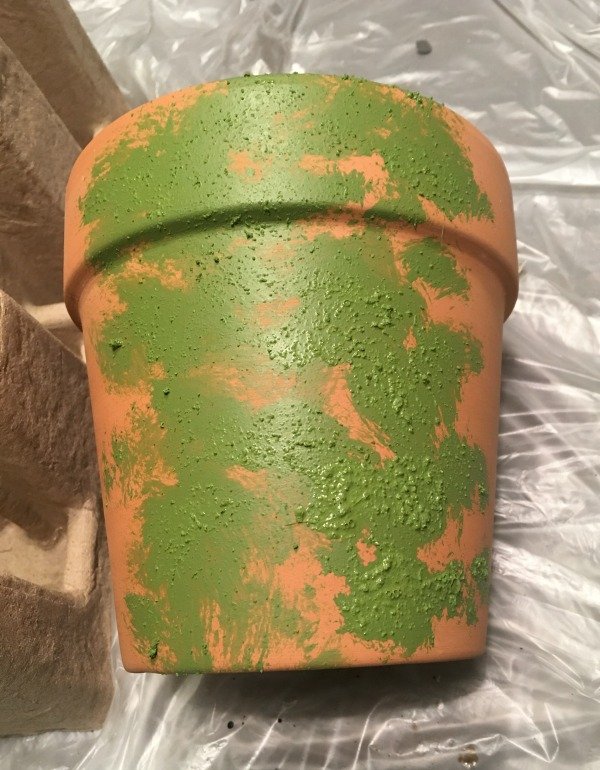
While the dark is still wet, add the light color on in areas, in the same way you did the dark paint.
How much dark to light, or if you want the original color of the pot to show through is up to you.
After you have done the dark and light, if you want to add more dimension, this is a good place to use the paint that has run together on the plate.
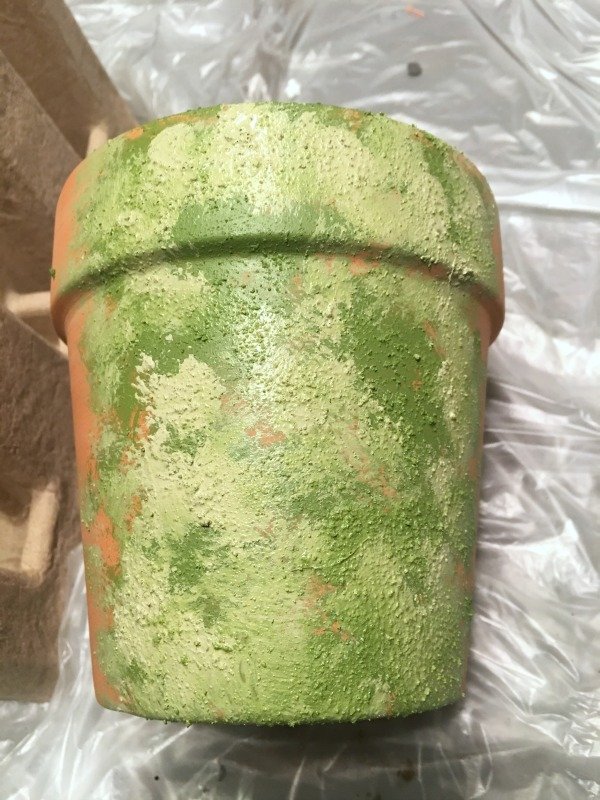
As with most projects, you do this until you achieve the effect you want. Maybe darker in some areas, then lighter in some. You may not want it even completely covered.
Although it’s easier to “muddle” your colors while they are wet, you can go back and touch it up after drying. I’m even thinking of adding just a few hits of white – using outdoor paint if you plan on this being outside.
Practice is always good when trying a new product – you could try this on a scrap piece of wood or cardboard. Since you aren’t going for that perfect, smooth finish, it would be possible to even wipe some of the paint off while it is still wet.
Too textured – hit it with sand paper to smooth the surface.
Remember, this is your own piece – make it pleasing to you. It’s art.
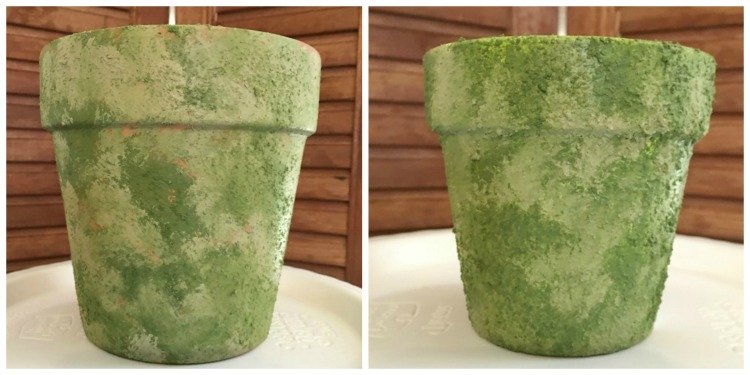
Here’s a look at different textures – left is very light touch and right is heavy textured. Which do you like better?
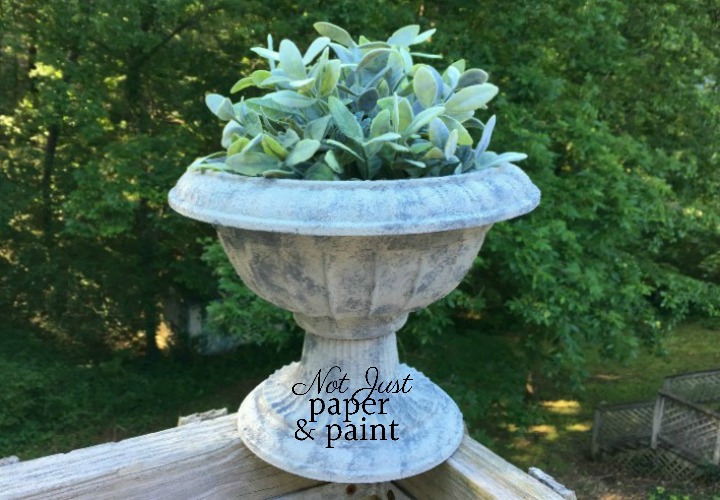
Old Concrete Planter
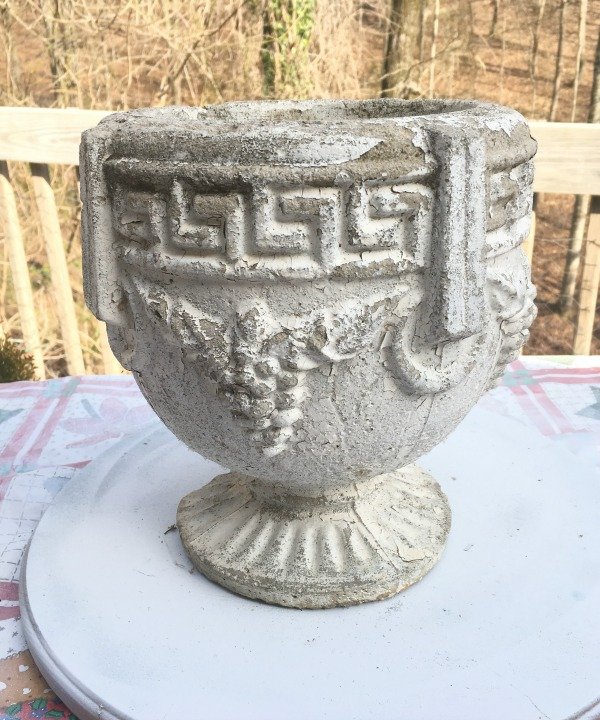
I love to find these at sales and most of the time they aren’t that expensive, but they are heavy. Make sure to check for cracks though.
I used the same procedure for preparing my paint on a plate then hitting just a few places with the dark paint.
Then just a little light, going back to add more as desired.
I used the paint on places where I thought it would age naturally.
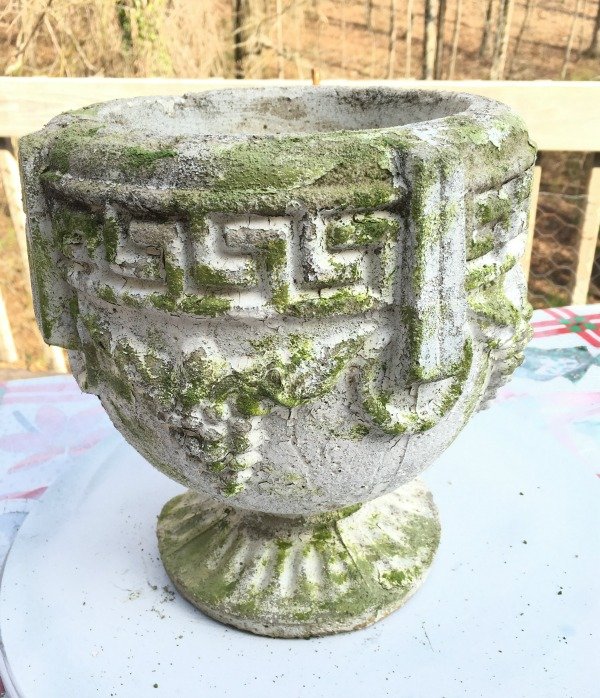
This was one of those projects which took less than 5 minutes and I absolutely LOVE it. Maybe one of my favorite quick projects EVER.
A painting tip – this is sitting on an old turntable which makes it so much easier to turn while paining, especially when spray painting.
Can’t you just see some new concrete planters made to look old? Or there are the newer types, made to look like concrete, but are very lightweight.
There’s also faux concrete paint by Plaid which I will be working with so be on the lookout for this.
Look for this at Michaels or other craft stores.
Now who’s ready to get ready for spring?
, Light Dark Moss Carded, 2 oz") FolkArt Painted Finishes Se...Shop on Amazon
FolkArt Painted Finishes Se...Shop on Amazon
Here’s another project with a painted planter.


I’ve included affiliate links to Amazon for you to find some products easier. I may receive a small commission, but the price is the same for you. It just helps my blog out.
Happy Travels,
Rosemary


Rosemary I love that paint effect the concrete planter looks incredible and I like how it takes down the harsh orange of the terracotta planters too.
I’m really liking it. And I think it has possibilities. Thinking of maybe a stain or white to change up the green.
Inspiredto do something with my planters I bought at Christmas. It’s almost time up here to plant. Have a good day.
I’m really liking it on the concrete. I need to experiment a bit more with the moss. Trying out another outdoor paint this week too.