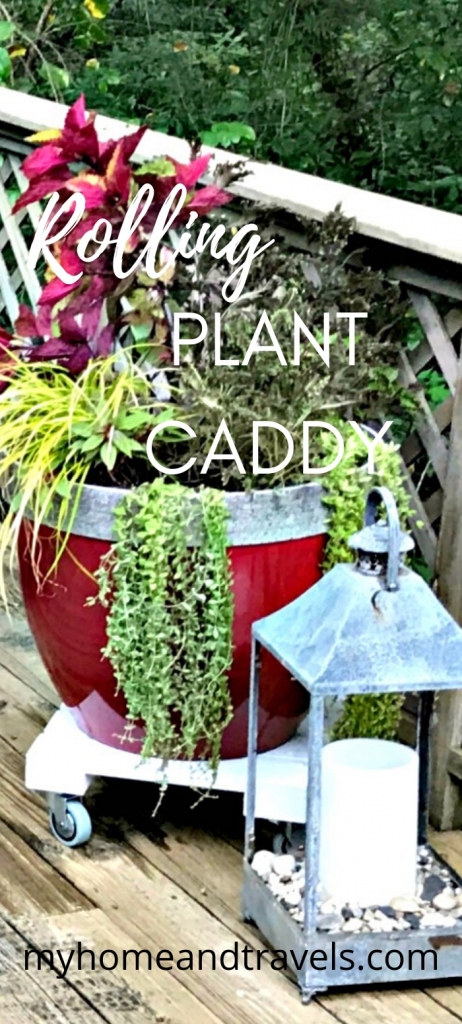
DIY A Rolling Plant Caddy
It’s easy to make a rolling plant caddy using scrap wood, or just a few pieces from a local lumber store. Many big box stores will even cut your lumber for you. Make these to fit the size and weight of your pots. This one is heavy duty.
Why do you need a rolling plant caddy?
Advantages of having a rolling plant caddy can be to roll the large pots around while planting to avoid lifting, rotating in the sun, and also it keeps them off the floor surface.
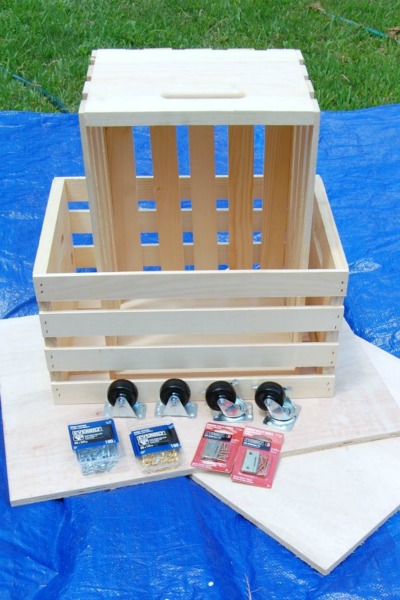
I have included everything I used to make this caddy, but in no way do you really have to have everything. It did, and can make it a bit easier, but an old fashion hammer and nail or screws can work too. Check out the links to the company and also to Amazon. My favorite power tools come from RYOBI.
How easy is it to build?
This is a great project for your stash of wood, and it’s rather easy for even a beginning woodworker.
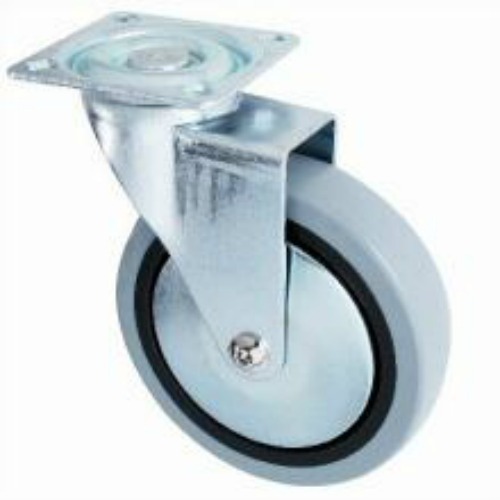
Choosing your casters should depend on how big and heavy your pot will be. Shop around as they can be very expensive. This set from D. Lawless Hardware are heavy duty, and fairly priced for the amount of weight they hold. Make sure to get the type which screws in.
What size can I make it?
With the large planters being used on the deck, I decided to make the plant caddy 16′ square. Sometimes I like to work in more even numbers just for convenience. You may have smaller planters, so make it to fit your needs.
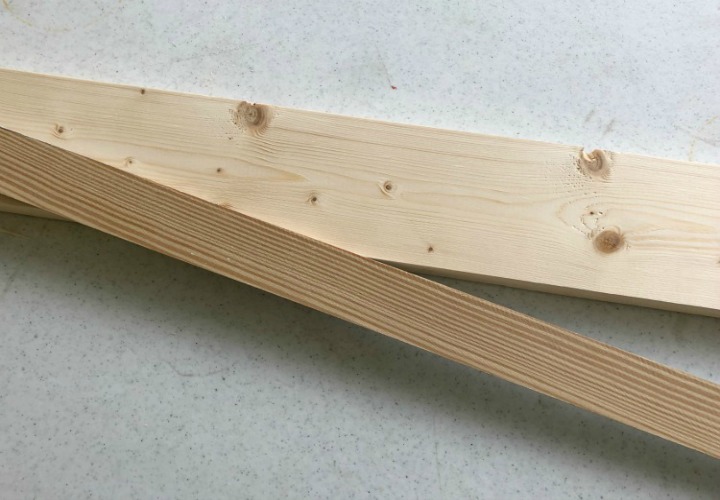
What kind of boards can I use?
The ones most often found, and the cheapest are known as “common” boards at stores such as Lowes or Home Depot. Some woods are more expensive but would look great such as cedar and teak. Just give them a proper seal for the outdoors.
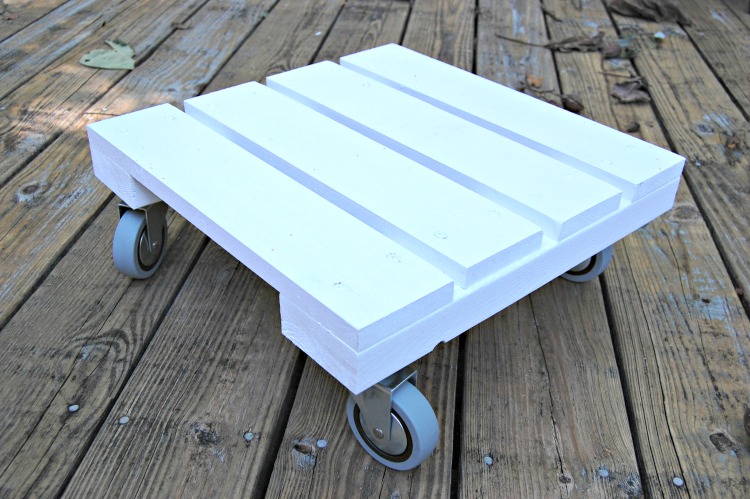
Here’s the size of cut boards.
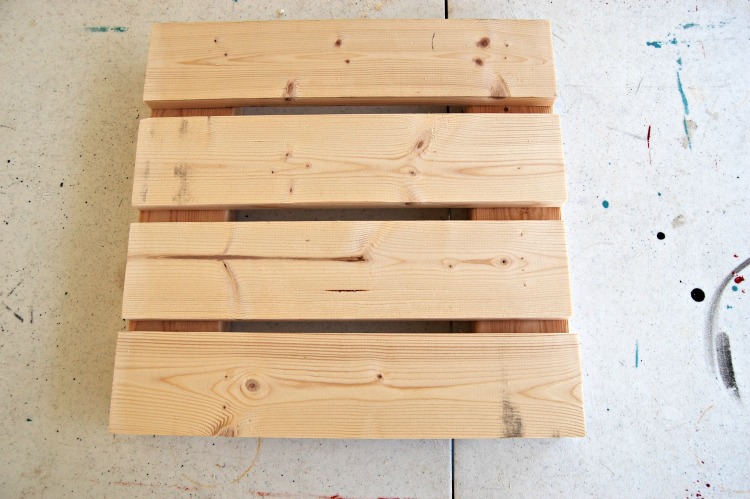
4 – 1′ x 4″ x 16″
2 – 2′ x 4″ x 16″

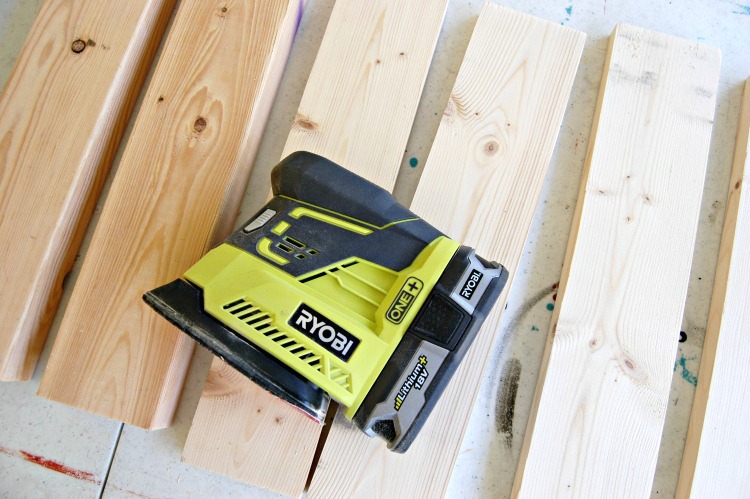
After cutting your 6 boards, sand all edges and rough spots.
Lay the 4 – 1″ x 4″ side by side approximately 1/2″ – 3/4″ inches apart. Remember a 4″ board isn’t really 4″ wide.
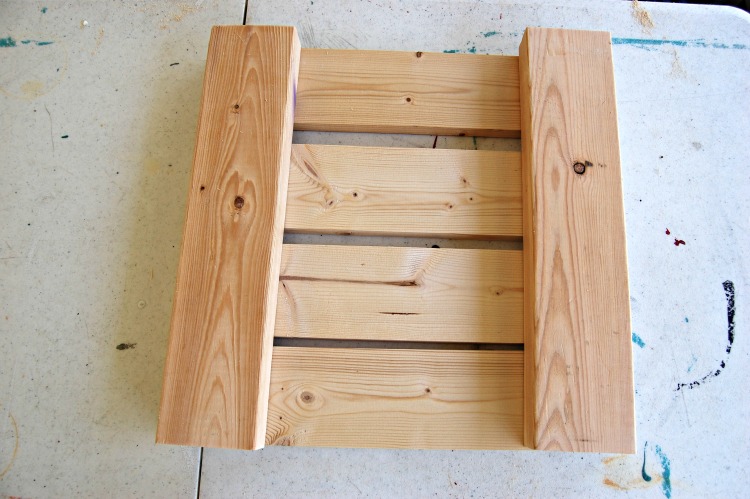
Line up the corners of the 1″ x 4″ with the 2 – 2″ x 4″ to make your square. Lining these up first and attaching will make it easier to space your 2 center pieces more even.
Apply wood glue toward the corner of each 2″ x 4″ and line them back up on the 1″ x 4″. As you do more projects, you will find your favorite products. Gorilla Glue have so many from the awesome wood glue, Super Glue, to glue sticks.
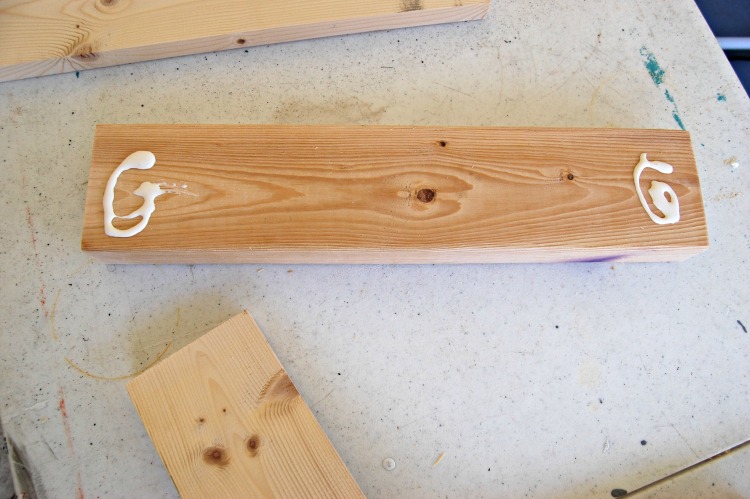
Use a nail gun to attach the 1″ x 4″ to the 2″ x 4″. Add a screw in each corner for extra durability. Each should be about 1 3/4″ – 2″ long.
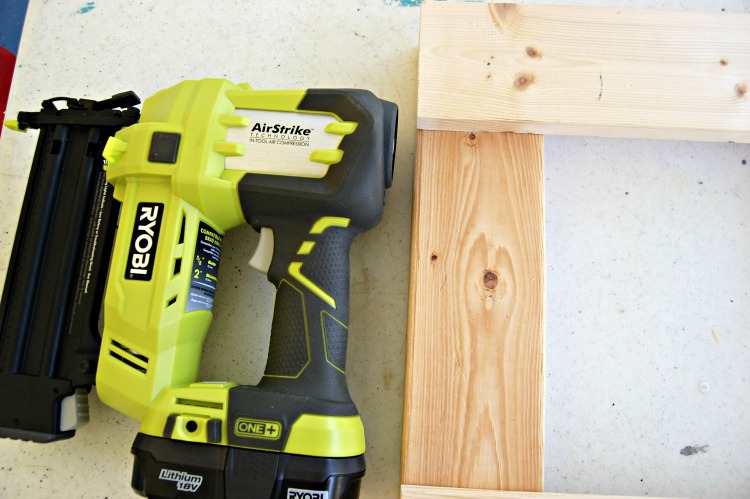
If you don’t have a nail gun, a nail or screw will work, being sure they are rust-proof.
Top View
Bottom View
Using Decoart Outdoor Living Paint in Picket Fence, give it two coats for good coverage. Follow directions on the jar and allow to dry overnight.

Picket Fence is a great white, but choose any color to match your decor. This is my go to paint for any outdoor project. Remember the house number sign?
Follow directions on any paint or supplies you use for best results.
Make sure all sides are painted to seal the wood.
Let dry thoroughly between coats, following directions for paint. I usually let projects dry overnight before handling it too much.
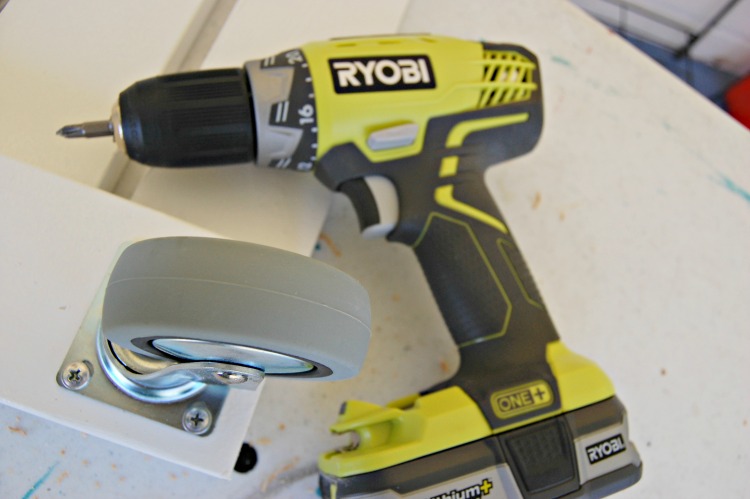
The next day – mark for your caster placement on the underside of the 2″ x 4″.
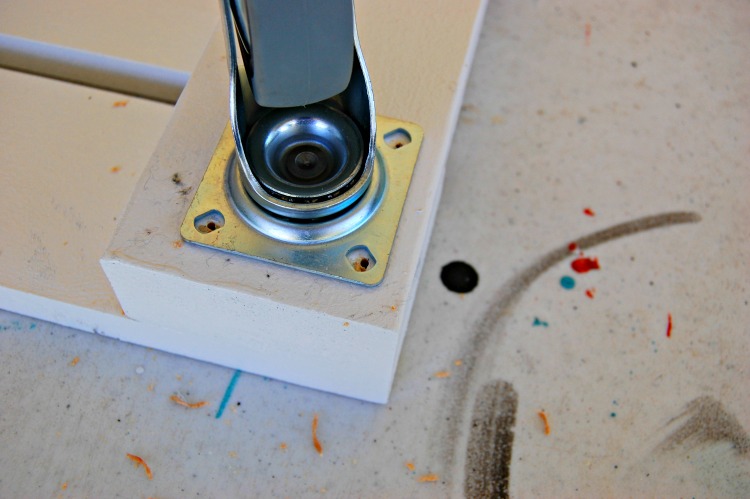
Drill pilot holes for these.
Using 1″ – 1 1/2″ inch wood screws, attach casters.
You now have a caddy which will last for years.
More Easy Project Ideas
") Gorilla Wood Glue, 18 Ounce...Shop on Amazon
Gorilla Wood Glue, 18 Ounce...Shop on Amazon
, White") Decoart PicketFence America...Shop on Amazon
Decoart PicketFence America...Shop on Amazon
 Drill Set Bundle with Ryobi...Shop on Amazon
 Ryobi P3650B ne+one 18-volt...Shop on Amazon
 Ryobi P401 18V Corner Cat F...Shop on Amazon


I’ve included affiliate links to Amazon for you to find some products easier. I may receive a small commission, but the price is the same for you. It just helps my blog out.
Happy Travels,
Rosemary


I really need to make some of these. I have large pot plants that need to be brought under my pergola ever winter so the frost does not kill them. I am getting to old to keep lifting them. Thanks for the idea.
Sometimes you don’t realize how heavy a planter can be, especially a large one.
Ooooooo….I need this in my garden now! Thanks for the tut -:D.
They are so handy. I even have my grill on my patio on one.
I love to have concrete planters and bird baths for decorating outdoors. This plant caddy would be so handy here at Farmhouse1820.
I have one I have my electric grill on too. Heavy duty casters can really make a difference.
Rosemary these are really nice to have. Lot cheaper to make them than buy them.
Great way of using up scrap wood, or just buying a couple pieces.
I bought some at a hardware store and they aren’t sturdy enough. These look like they would work perfectly. I need to make about 4 of these. Thanks for sharing.
The weight your casters will hold is real important for large pots. They do come in handy.
Thanks for the idea and tutorial. It’s perfect for my apartment cottage porch. Thanks for the suggestion!
We even have our electric grill on it on our patio.
What a handy idea for those plants that need to move around during the season. Great share.
I had originally made these for our large deck, but them come in handy for our smaller patio. I have our grill on it.