Simple Shelf with Hooks
If you need a shelf in your entry for keys or bathroom for hanging towels, here’s a great idea. What about in a child’s room for coats or backpacks?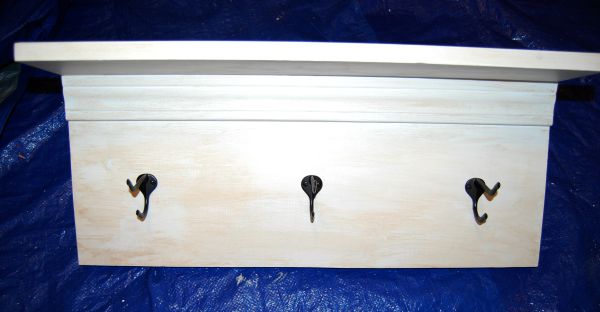
This was inspired by this month’s DIH (Do It Herself) Workshop at Home Depot designed by Shanty2Chic. If you’re not familiar with Ashley & Whitney, they are a must see, especially for anything wood and furniture. I have attended several classes with them and watched them on Periscope – they are such fun.
Each month on the 3rd Thursday of the month, Home Depot hosts a DIH Workshop a new project is presented. It’s a great way to learn about anything DIY. In the past, it’s included working with power tools, tiling, and woodwork. You can register online. Next month it’s a Rustic Decorative Pumpkin Stand.
I loved the chunky shelf with mitered corners which is being presented but thought I would make a version which would be easier for anyone who is just beginning DIY. This can be made any length to fit your space.
One reason this is a good starter project, you can get all of your wood and trim cut at Home Depot if you don’t have a saw.
With any project, it’s always easier if you gather everything you need for the project before you start.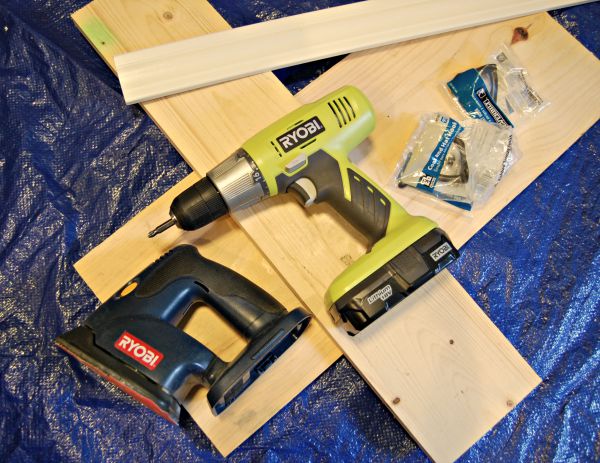 Supplies needed:
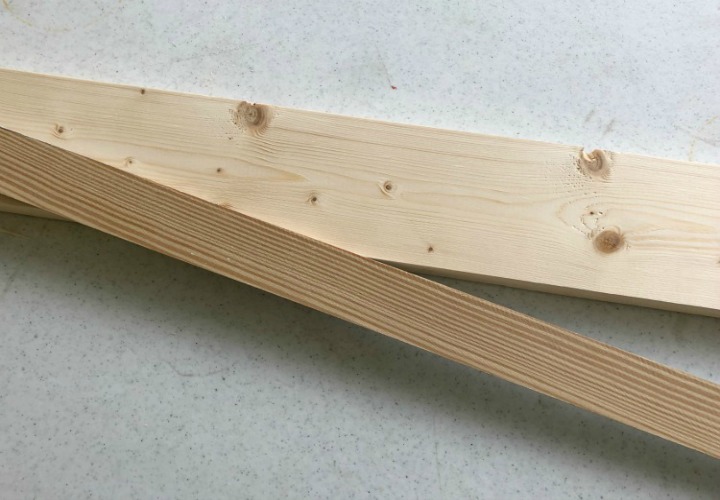
Supplies needed:- 1″ x 10″ board
- 1″ x 4″ board
- Trim board
- Wood glue
- Nails – sizes vary
- Wood putty
- Sandpaper
- Paint
- Wax – clear and dark
- Hooks
Power tools such as Ryobi Drill and Sander are great to have as you begin to build your power tool collection.
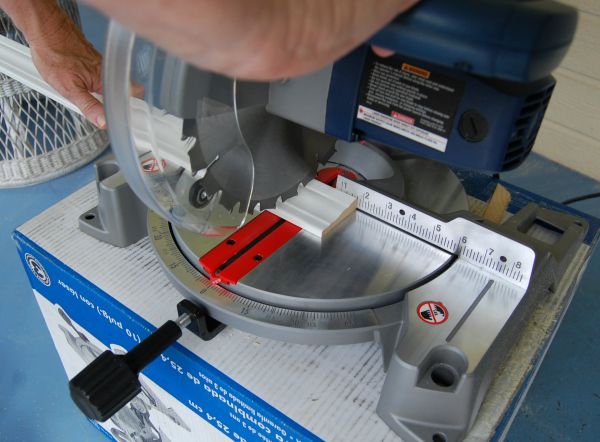
Determine size of shelf and cut the boards and trim to length. Mine were 26″ in length.
Notice my make-shift table. It was raining so a workshop was set up on the front porch. Love my Ryobi saw. But remember, Home Depot will be glad to cut your boards if you don’t have a saw.

Sand as needed, especially the cut areas. If you don’t have a power sander, sand paper or a sanding block will work fine too.
For this project, painting after the project was complete was easier to me.
Stand the 10″ board vertically and run a small bead of wood glue along the top edge. 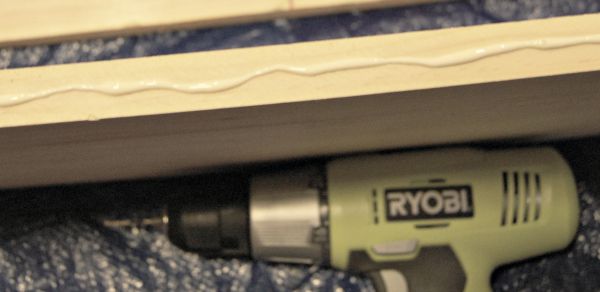
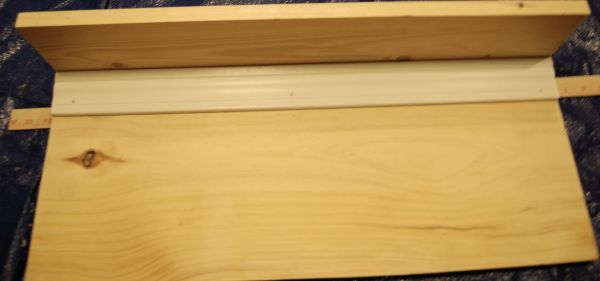
Place the 4″ board as the shelf aligning all the edges. Having a 2nd person to help hold this helps a lot.
Drill 3 small pilot holes 1/4″ from the edge for your nails.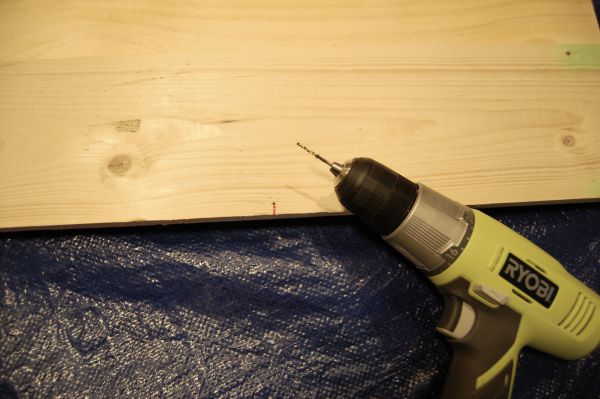
Nail shelf together. Wipe off any excess glue with a damp cloth.
Make sure your nail is long enough to go through the shelf and into the wood. Mine were 1 1/2″. If your shelf is longer, add nails aboutevery 8″ – 10″.
Apply a bead of glue along the under edge of shelf for trim piece. Use a small nail or brad and attach trim. Again, wipe off any excess glue with a damp cloth.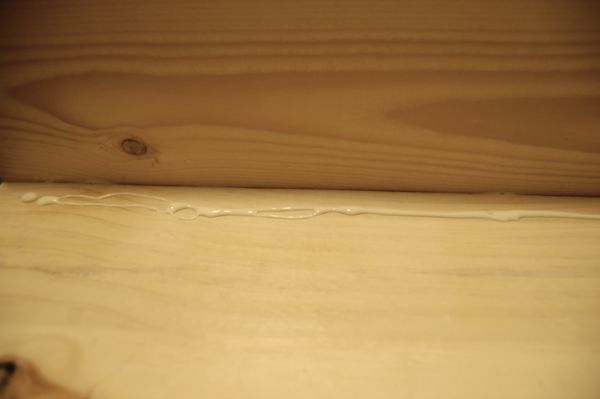
Fill in all nail holes with putty and allow to dry. Sand if needed.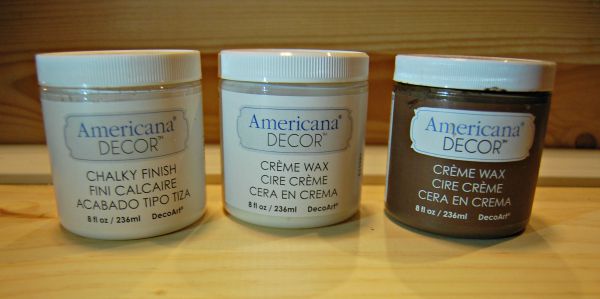 Using Americana Decor Chalky Finish in Everlasting, apply first coat and allow to dry. Always follow directions on can.
Using Americana Decor Chalky Finish in Everlasting, apply first coat and allow to dry. Always follow directions on can.Since this was unfinished wood, there was a lot of wood grain to raise so a light sanding was needed to smooth it out. Also, unfinished wood will absorb more paint than a previous painted piece.
Wipe off dust and apply 2nd coat.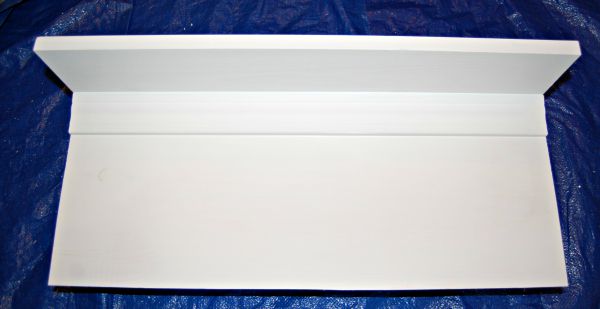
Let dry. Although it is dry within 30 minutes, I waited about 2 hours before going to my waxing steps.
Apply Americana Décor Clear Crème Wax over all surfaces using a soft cloth, such as an old t-shirt.
For the antique look apply Americana Décor Crème Wax in deep brown a small section at a time. It’s important to apply this wax over clear wax while it is still soft. This allows you to be able to wipe off any excess dark wax as you apply. If you get a little more dark wax than desired, use a little clear wax on a soft cloth to remove it.
Allow to dry for about an hour and buff with a soft cloth to bring out a nice shine.
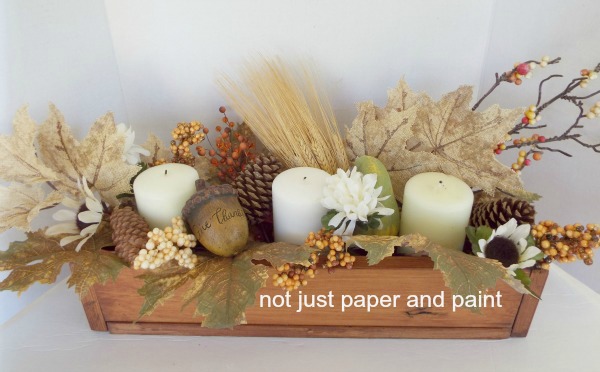
Determine where hooks will be placed. Using an odd number is always is more eye pleasing. For 3 hooks, place first one in center then measure out evenly for placement.
Attach hooks with screws provided.Depending on size and weight of shelf, purchase brackets or my favorite, 3M Command Strips to hang. If this is going onto drywall, anchors are best to use. You can always ask an associate at Home Depot for recommendations.
Depending on size and weight of shelf, purchase brackets or my favorite, 3M Command Strips to hang. If this is going onto drywall, anchors are best to use. You can always ask an associate at Home Depot for recommendations. I have used Americana Decor Chalky Finish for several small projects and really like the results. The waxes are very soft and easy to apply with a rag or a brush.
HINTS
Anytime using new stains or glazes, I make a sample board to see how it covers. The longer you leave a stain or dark wax on, the darker it will be.
Always check boards carefully when purchasing to find one straight and no cracks.
Gather all supplies before starting any project.
Determine which side of the boards you will use for front/back and also top/bottom. If not painting all sides, mark your non-painted sides either with a Sharpie or a piece of painters tape.
Unfinished wood will absorb more paint, so a primer might be needed. Various types wood will absorb paint and stains differently.
When painting unfinished wood, the grain of the wood will usually raise a bit so a light sanding helps to smooth.
Pine wood is a softer wood so it’s easier to sand and to nail into.
Drilling a pilot hole before nailing, or inserting a screw, helps to keep the wood from splitting, especially on thinner wood and close to the edge.
If you plan on staining, make sure your wood is stainable. The putty should be stainable also.
Wood putty is also great for filling in any uneven places in the woods, such as knots.
Wear gloves to keep stain from getting on your hands.

I’ve included affiliate links to Amazon for you to find some products easier. I may receive a small commission, but the price is the same for you. It just helps my blog out.
Happy Travels,
Rosemary

We need this! We just moved into a house where there are no shelves and BOY do we need them. My hubby is very talented with this kind of stuff I can’t wait to show him this!
It is a fun and easy project. Just make it any size and color.
I am not DIY savvy but I think I could definitely attempt this project, nicely done I love it
This is a really good DIY post for a shelf! It doesn’t involve too much work and the end product looks so classic. *Bookmarking this!*
It was easy. Plus so much of this you might have around the house.
Thank you for this. We have been looking for a simple shelf idea to use for our son’s room. And this fits that perfectly. Will be using this weekend!!
Post a picture of your project. Can make any size to fit your needs.
Com and strips will hold a shelf like that plus stuff hanging on it? I had no idea! Why am I putting holes in walls? Geez!
What a great DIY project. This would be perfect in my house because we have so much stuff…how do such little boys acquire so many things?!?! Sigh.
We really need one of these in our mud room! The kids need some place to hang their stuff so it can dry before they (I) put it in the closet.
Love the shelf! Somebody sure is handy and talented with that saw! 🙂 I love that you added a shelf and hooks for dual purpose use! Adorable! Now I have to get my hubs to make me one! 🙂
Can be done for so many areas. Hope you get to try one._
I would like to do this for my house. thanks for this great tips!!!
This can be done for so many areas. Hope you try it.
I need to get braver and try more DIY projects! This looks like a good project to start out with!
Wow this is so awesome! I wish I was good at DIY. My husband and I suck at it. 🙁 We just end up buying it.
This is amazing DIY project I’ve ever seen!! I wish I could try it alone lol. I wanna try it out.
It can be done alone, just prop the top shelf up on something as you are nailing it.
What a great project! I love that all of your tips make it seem so easy. I’m a non-building kind of person and even I think I could do this because of your great tips!
Very easy. Get the wood cut at Home Depot and that’s the biggest part done for you.
You make this look so simple. Thanks for the great tutorial!
Very easy project. Also great for getting kids involved.
This would definitely be a great piece to have in a bathroom! Unfortunately I am about as klutzy as they come and would probably end up with stain on everything but where it was intended to go.
What a great project! This would work really nicely in our mud room, bathroom or even our bedroom.
What a cute project. I have used Americana Decor Chalky finish paint on other projects in the past. I will be pinning this project for later.
So many possibilities for this shelf – color and sizes. Make it your own.
What a fun project! This is something I could probably do on my own, and luckily my hubby has all those tools. Thanks for the tutorial!
This is a very easy project for any beginner. Let me know what you do.
I love DIY, but I’m so scared of building with tools. I need to go to one of those DIY for HER clinics at Home Depot and get over my fear. Your shelf looks great!
Oh wow, this project came out nicely. I love the sense of accomplishment that comes with completing a DIY adventure.
OMG what a cute shelf!!! A shelf like this would be awesome in my entrance way for my daughters backpack!
This is awesome. I love watching people make items from scratch and always say that I’m going to try. Maybe I’ll marry a handyman to help. 🙂