Add New Life to Old Christmas Decorations Part 2
As you continue to finish your decorating don’t throw the old or broken items out until you think if they can be made pretty again. Did you see my last post about bringing new life to old Christmas decorations? So here’s Add New Life to Old Christmas Decorations Part 2.
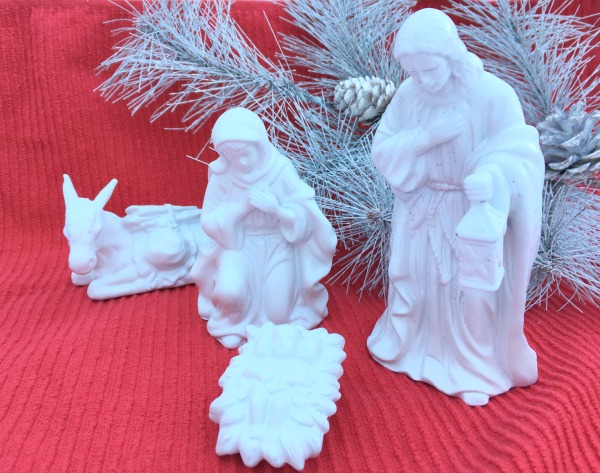
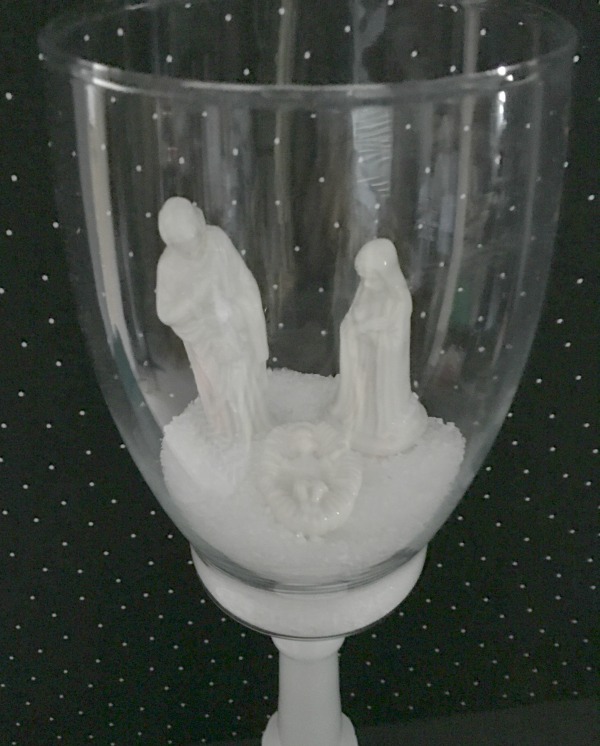
NATIVITY SET
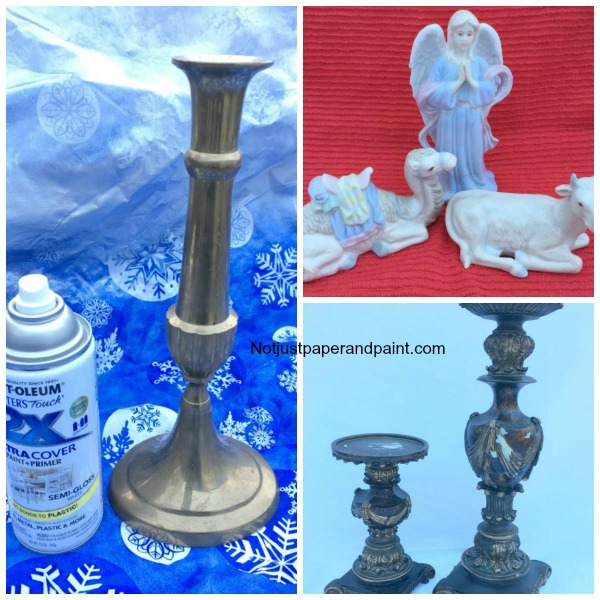
There’s not too many flea markets or yard sales you go to which you can’t find a set. This was a brand new 13 piece set I found for $5 but I knew the pastel colors wouldn’t work. But a few coats of paint would rescue it for me.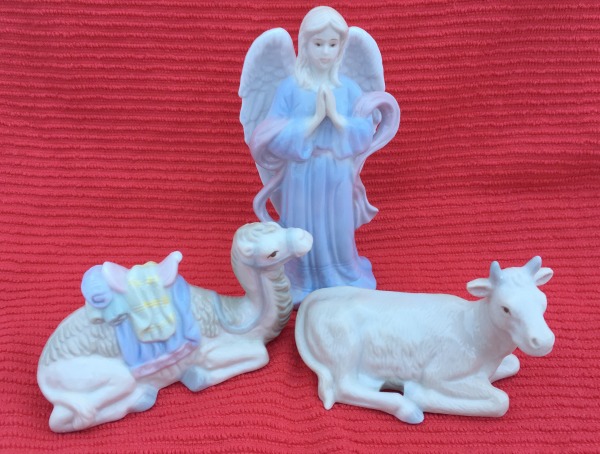
I gave it a couple coats of Rustoleum 2X, following directions on the can. The paint has primer and since I was covering a light color, an additional coat of primer wasn’t necessary.
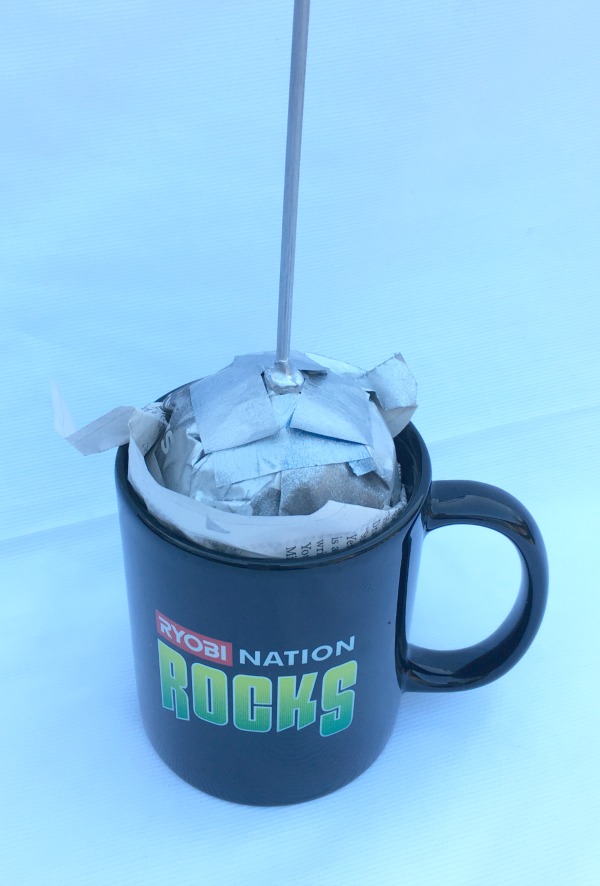
ORNAMENTS INTO PICKS
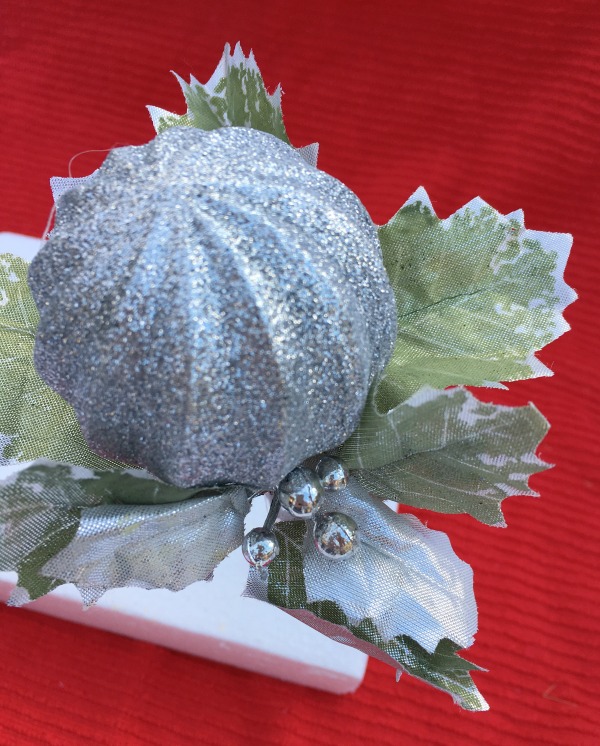
Each year there’s always those ornaments which seem to have a broken or missing cap, or faded or chipping paint. Not only can these be painted to reuse as an ornament, but with just some paint and a wooden skewer, you have a new pick for your tree or wreath.
If the ornament doesn’t need to be painted, give the skewer a coat of paint either to match the ornament or the tree.
Using a glue gun, my choice of course if the new Ryobi, place a little glue at the opening of the ornament then insert the skewer all the way in. A little more glue may be needed around the opening to secure it.
Holding it in place until the glue starts to set, maybe 20 – 30 seconds.
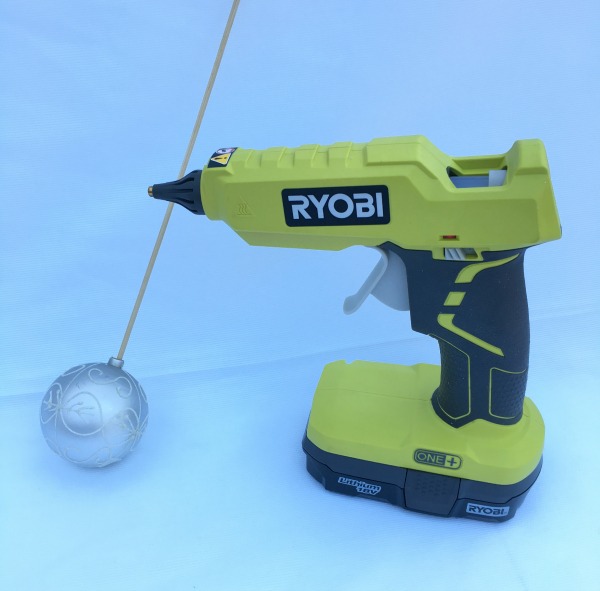
Place it in a cup or holder to completely set up.
If you forgot to paint the skewer before you glue it (like me) wrap a bit of paper and painters tape before painting. Allow to dry.
Add other leaves, berries, or mini pinecones for more embellish.
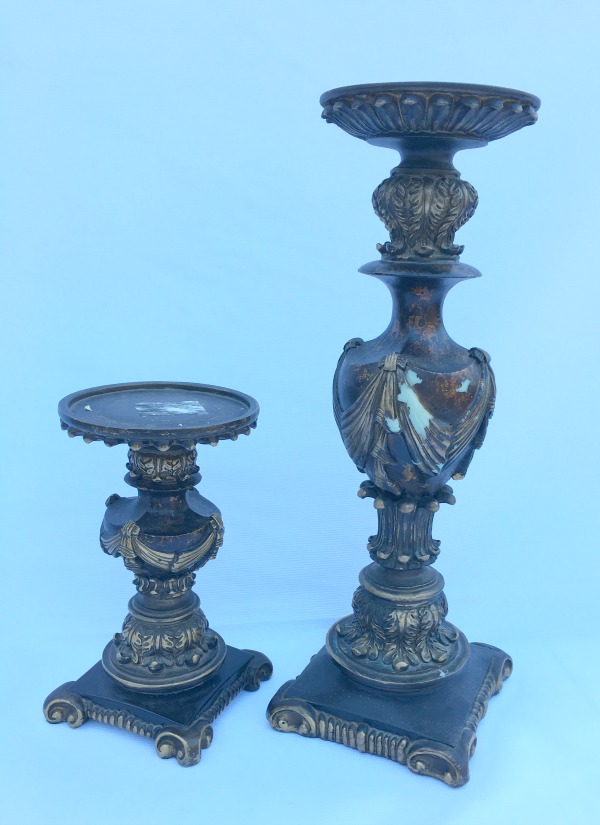
GLITTERED CANDLESTICK
You will never look at a old, dark candlestick again.
By using paint and glitter, you can make this a one step process.
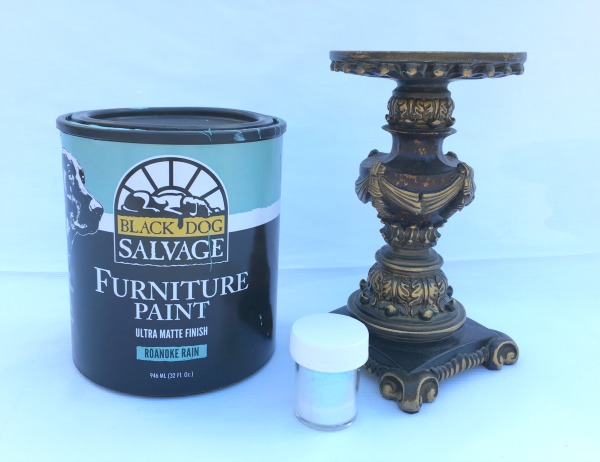
Making sure your candlestick is clean, paint a small section at a time. Depending on size, this might be about 1/3 to 1/2 of it.
While paint is still wet, sprinkle with glitter then shake off excess. Let this dry – and this can depend on the type of paint you use and how thick it is painted on. Most furniture paint works well for this because it does have a fairly quick dry time.
After the project is done and completely dry, give it a coat of high gloss sealer to keep your glitter from coming off so easy.
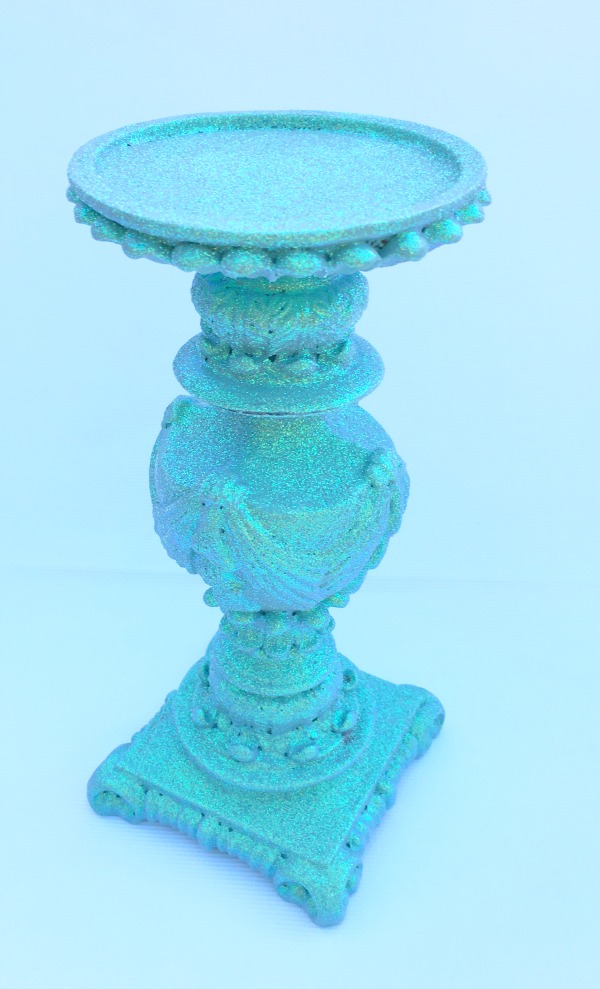
This candlestick was painted with Black Dog Salvage Furniture Paint then sprinkled with fine, iridescent glitter. A couple coats of gloss sealer was added.
A few tips on glitter:
Remember to save the leftover glitter so you can use again. I like to use a piece of parchment paper under the project.
The finer glitter gives a better shine and adheres better.
There’s also glitter glue pens if you want to highlight just an area.
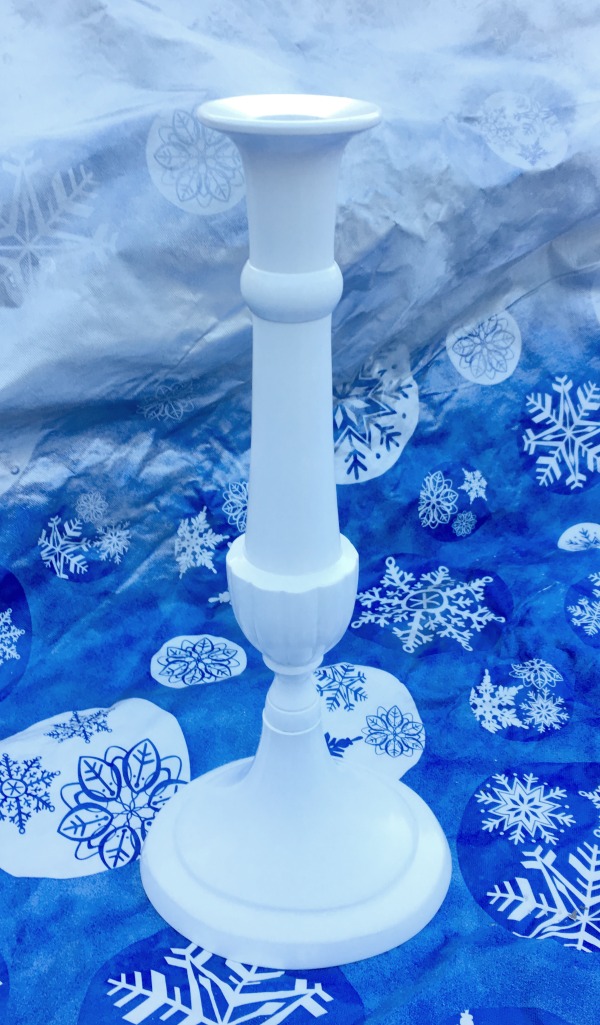
BRASS/WHITE CANDLESTICK
How many old brass candlesticks do you have or see at yard sales?
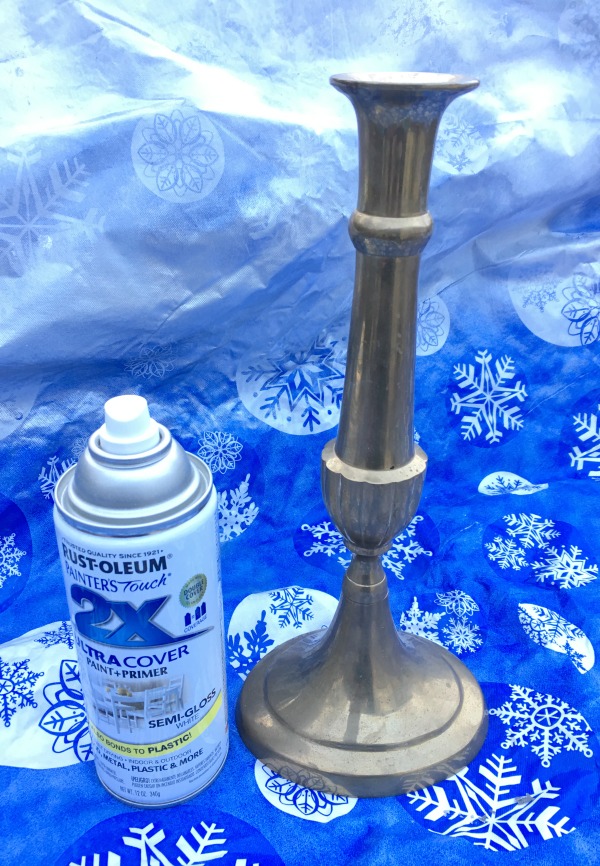
With a couple coats of gloss white, turn and old drab one into a fab one.
 To further make it pretty, here’s a couple options:
Turn a bell upside down and place a battery operated candle inside it. Use a little glue to hold bell in place.
Glue a clear vase or bowl onto the top. Fill with Epsom Salt, sand, or gravel. You are ready then to add a candle or small items to make a centerpiece.
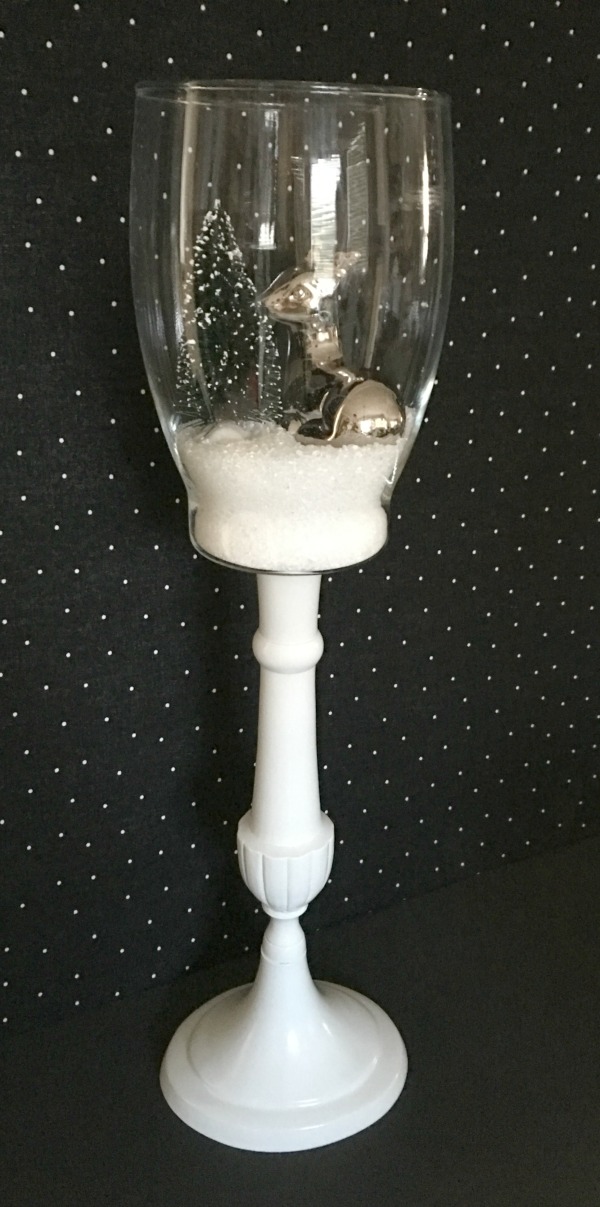
A plate could also be used on to to use as a serving piece.
If you use hot glue, most items can be removed CAREFULLY to change it up.
When the glue becomes cold, it becomes brittle. I like to use the tip of a thin steak knife to pop the glue off. Again, do this very carefully. The item can be placed in the freezer for about 20 minutes to help make it brittle.

I’ve included affiliate links to Amazon for you to find some products easier. I may receive a small commission, but the price is the same for you. It just helps my blog out.
Happy Travels,
Rosemary


You sure know how to bring new life into old items! I’ve never thought about using old ornaments as picks. White paint makes everything better and your Christmas decor looks beautiful and like new again. After seeing that glue gun in one of your other posts, I added it to my Christmas list. Fingers crossed!
I remember your part one but these are even better. Given me ideas for redoing some old decorations. Not throwing them away.
These are all really great ideas. I usually just donate most items that we don’t use for decorating anymore. I love that you updated them!
I need this RYOBI glue gun in my life. These are some really creative ways to revamp old decorations. I really like that ornament pick idea. That would be ideal for the wreaths I make out of old, mismatched ornaments that I just couldn’t bring myself to get rid of.
Theses are all great ideas. That glittery candlestick is my favorite, it is just so fun.
I’m not familiar with tree picks. My Mom is big on nativy sets and pastel would never work for her. You made it look like new by going all white.
What some absolutely fantastic ideas, it is amazing how you have given the old a whole new look and feel just by changing them around a little.
Some great repurposes here Rosemary and I believe in the power of paint. I don’t like to spend a lot for Christmas decor so usually paint a few things too here and there.
Your post goes to show that old items can still bring life to a room. All you need is a bit of creativity and a dash of pizzazz!
You’re so good at restoring your old decorations! I really like how you did the Nativity set.
Great Job! I love the step by step process that you showed. The re-dos are amazing!
Thanks. It’s amazing – and easy – to change things up.
I love the way you reinvented these Christmas decorations. With a little spray paint and some creativity, it’s possible to breathe new life into old treasures.
You’re doing such a great job upscaling those old ornaments. I love the transformations!
Great tips on how to repurpose old ornaments and objects. It is nice to use them again as opposed to throwing them out.
I can think of so many things I have thrown away or got rid of I could so do something with.
What an absolutely adorable and easy idea. I’m picturing so many of my old pieces coming back to life!
It is always so fascinating to see old decorations getting restored and come to life. These are some really wonderful suggestions and you seem to be doing magic with the old stuff.
I love the idea of repurposing things you already have around your home! I love th glittered candlesticks!!
I like the idea of gluing a clear vase to an old candle holder. Your finished product looks so pretty! I have to take a good hard look at my old decorations and see how I can make them come alive again.